Strapi is a leading open-source headless CMS that offers full JavaScript compatibility and extensive customization. By adopting a headless CMS approach, developers can decouple the frontend from the backend, enabling them to create a tailored tech stack and seamlessly distribute content across various channels.
In this tutorial, I will guide you through the process of deploying Strapi on DigitalOcean, a cloud hosting platform, using a PostgreSQL database. Let's begin by creating a new Strapi project with the following command, and then selecting the Quickstart option for initial settings:
npx create-strapi-app@latest strapi-demo
After the installation is complete, the app will start automatically. Stop the running process by pressing CONTROL/CTRL + C and we need to perform some initial configurations.
Open the strapi-demo folder in Visual Studio Code and launch a new terminal. We'll install the necessary dependencies and make configurations to the files.
Install Dependencies:
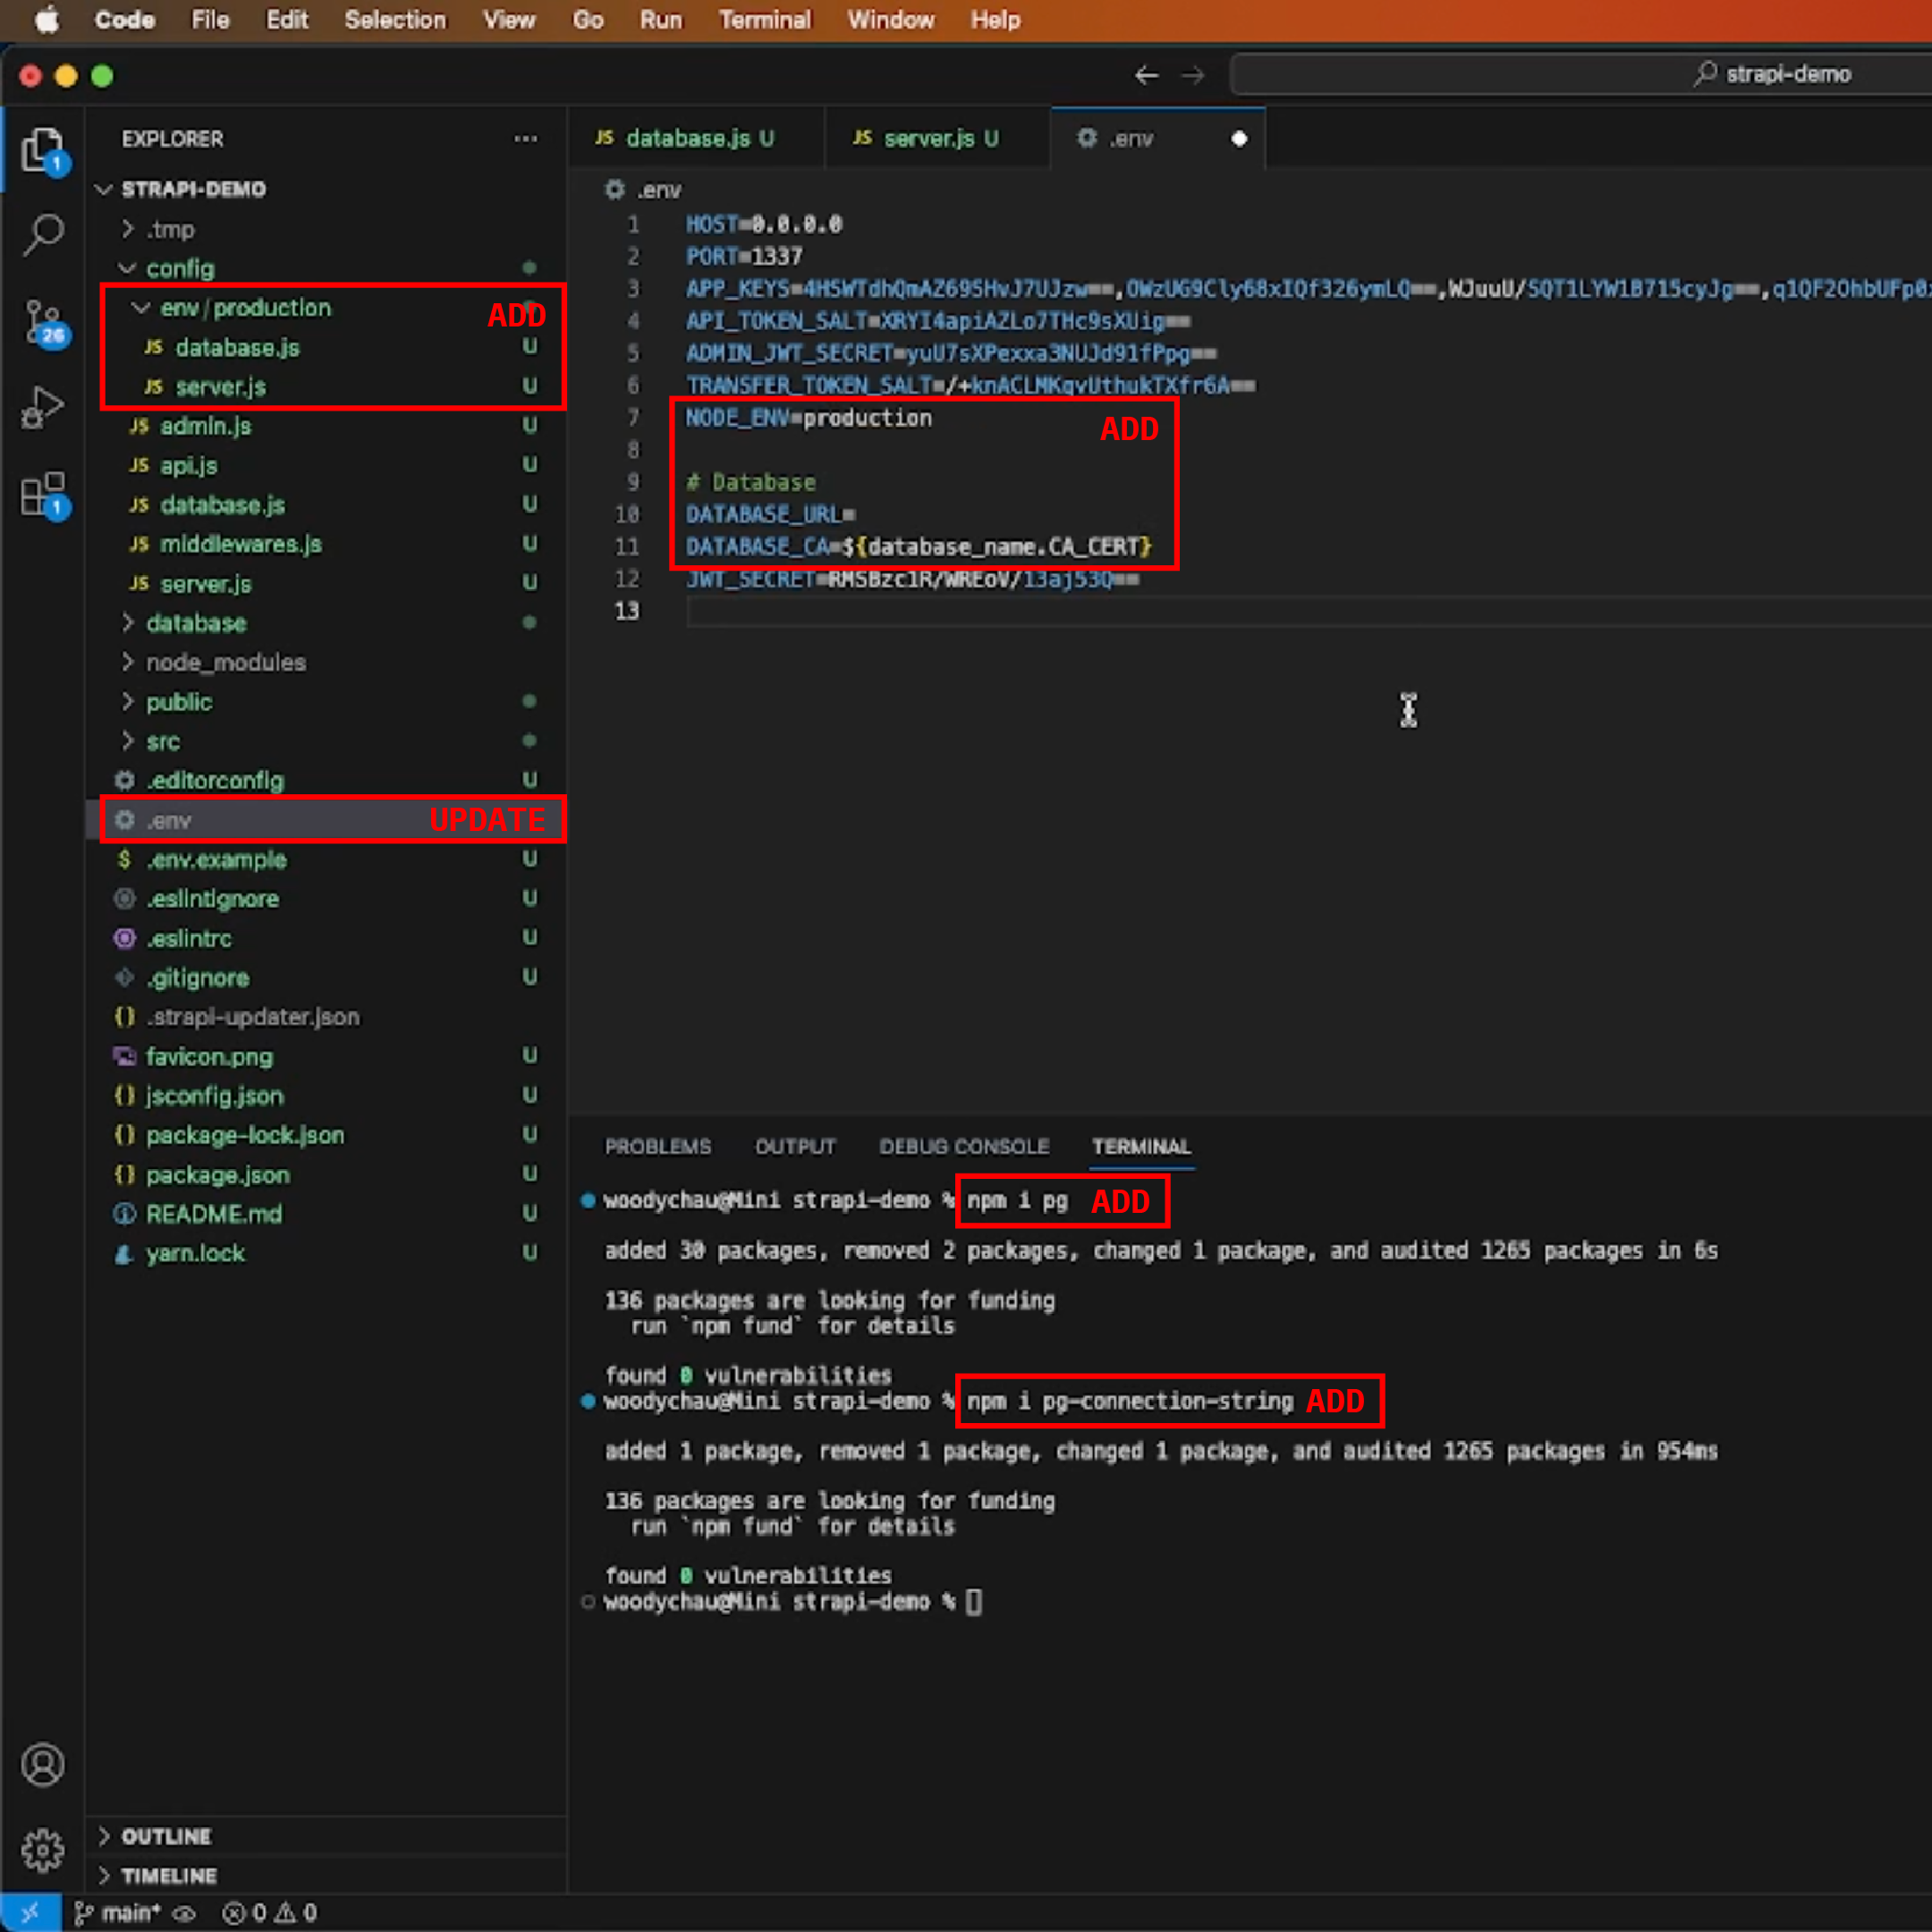
npm i pg
npm i pg-connection-string
Create Folders:
mkdir -p config/env/production
Now, let's add and update the following files:
Update: config/env/production/database.js
const parse = require("pg-connection-string").parse; const { host, port, database, user, password } = parse( process.env.DATABASE_URL ); module.exports = ({ env }) => ({ connection: { client: 'postgres', connection: { host, port, database, user, password, ssl: { rejectUnauthorized: false, }, }, debug: false, }, });
Update: config/env/production/server.js
module.exports = ({ env }) => ({ proxy: true, url: env('APP_URL'), // replaces `host` and `port` properties in the development environment app: { keys: env.array('APP_KEYS') }, });
Edit: .env
HOST=127.0.0.1 PORT=1337 APP_KEYS=<UNCHANGE> API_TOKEN_SALT=<UNCHANGE> ADMIN_JWT_SECRET=<UNCHANGE> TRANSFER_TOKEN_SALT=<UNCHANGE> NODE_ENV=production # Database DATABASE_URL=<YOUR DATABASE URL> DATABASE_CA=${<YOUR DATABASE NAME>.CA_CERT} JWT_SECRET=<UNCHANGE>
To store our records, we require a database, and our choice is to deploy a PostgreSQL database on DigitalOcean. For those interested, you can benefit from a $200 DigitalOcean credit using the following referral link: https://m.do.co/c/6636c3f35e79
Click the Create button located in the top right corner, then navigate to Databases. From the available options, opt for a data center location that is closest to your geographical location. For this tutorial, we'll select Singapore. Proceed by choosing PostgreSQL as the database type.
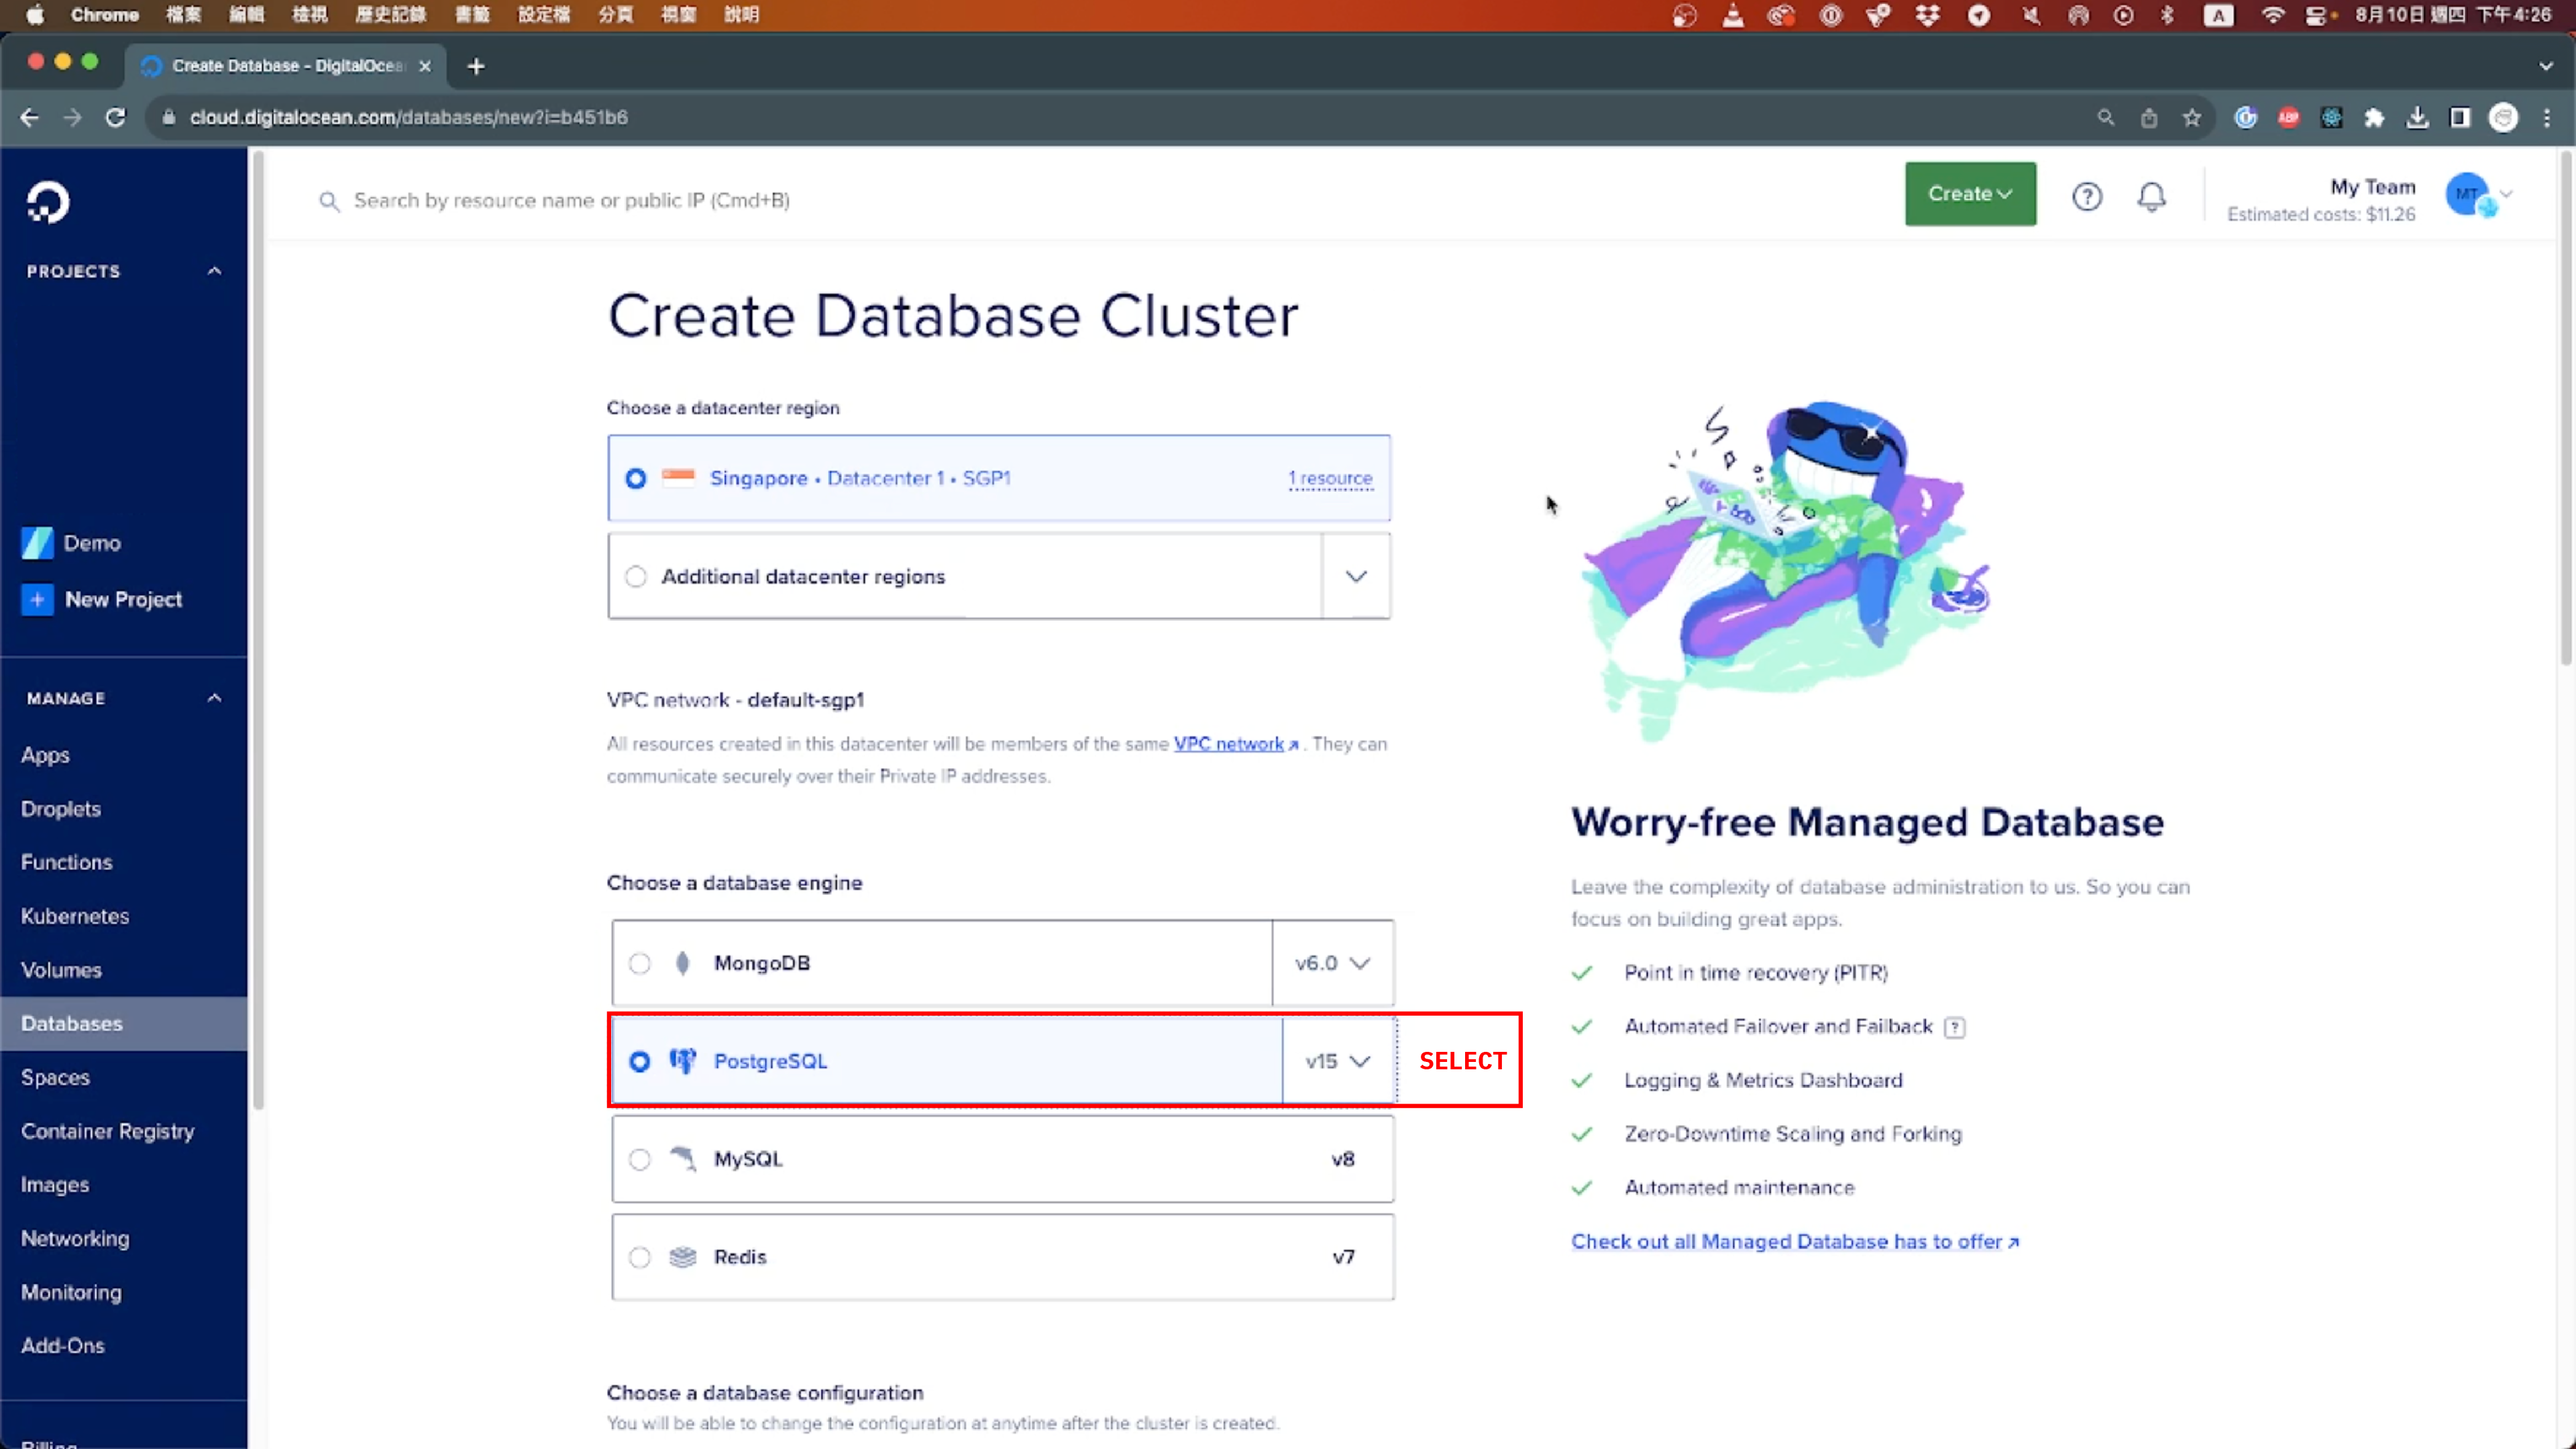
For the initial setup, the default plan will suffice. However, feel free to consider upgrading to a different plan based on your project's scalability requirements. Generate a distinctive name for your database cluster. In this instance, we'll designate it as strapi-demo. Additionally, you can allocate this database to a specific project folder. Let's label our project folder as DEMO.
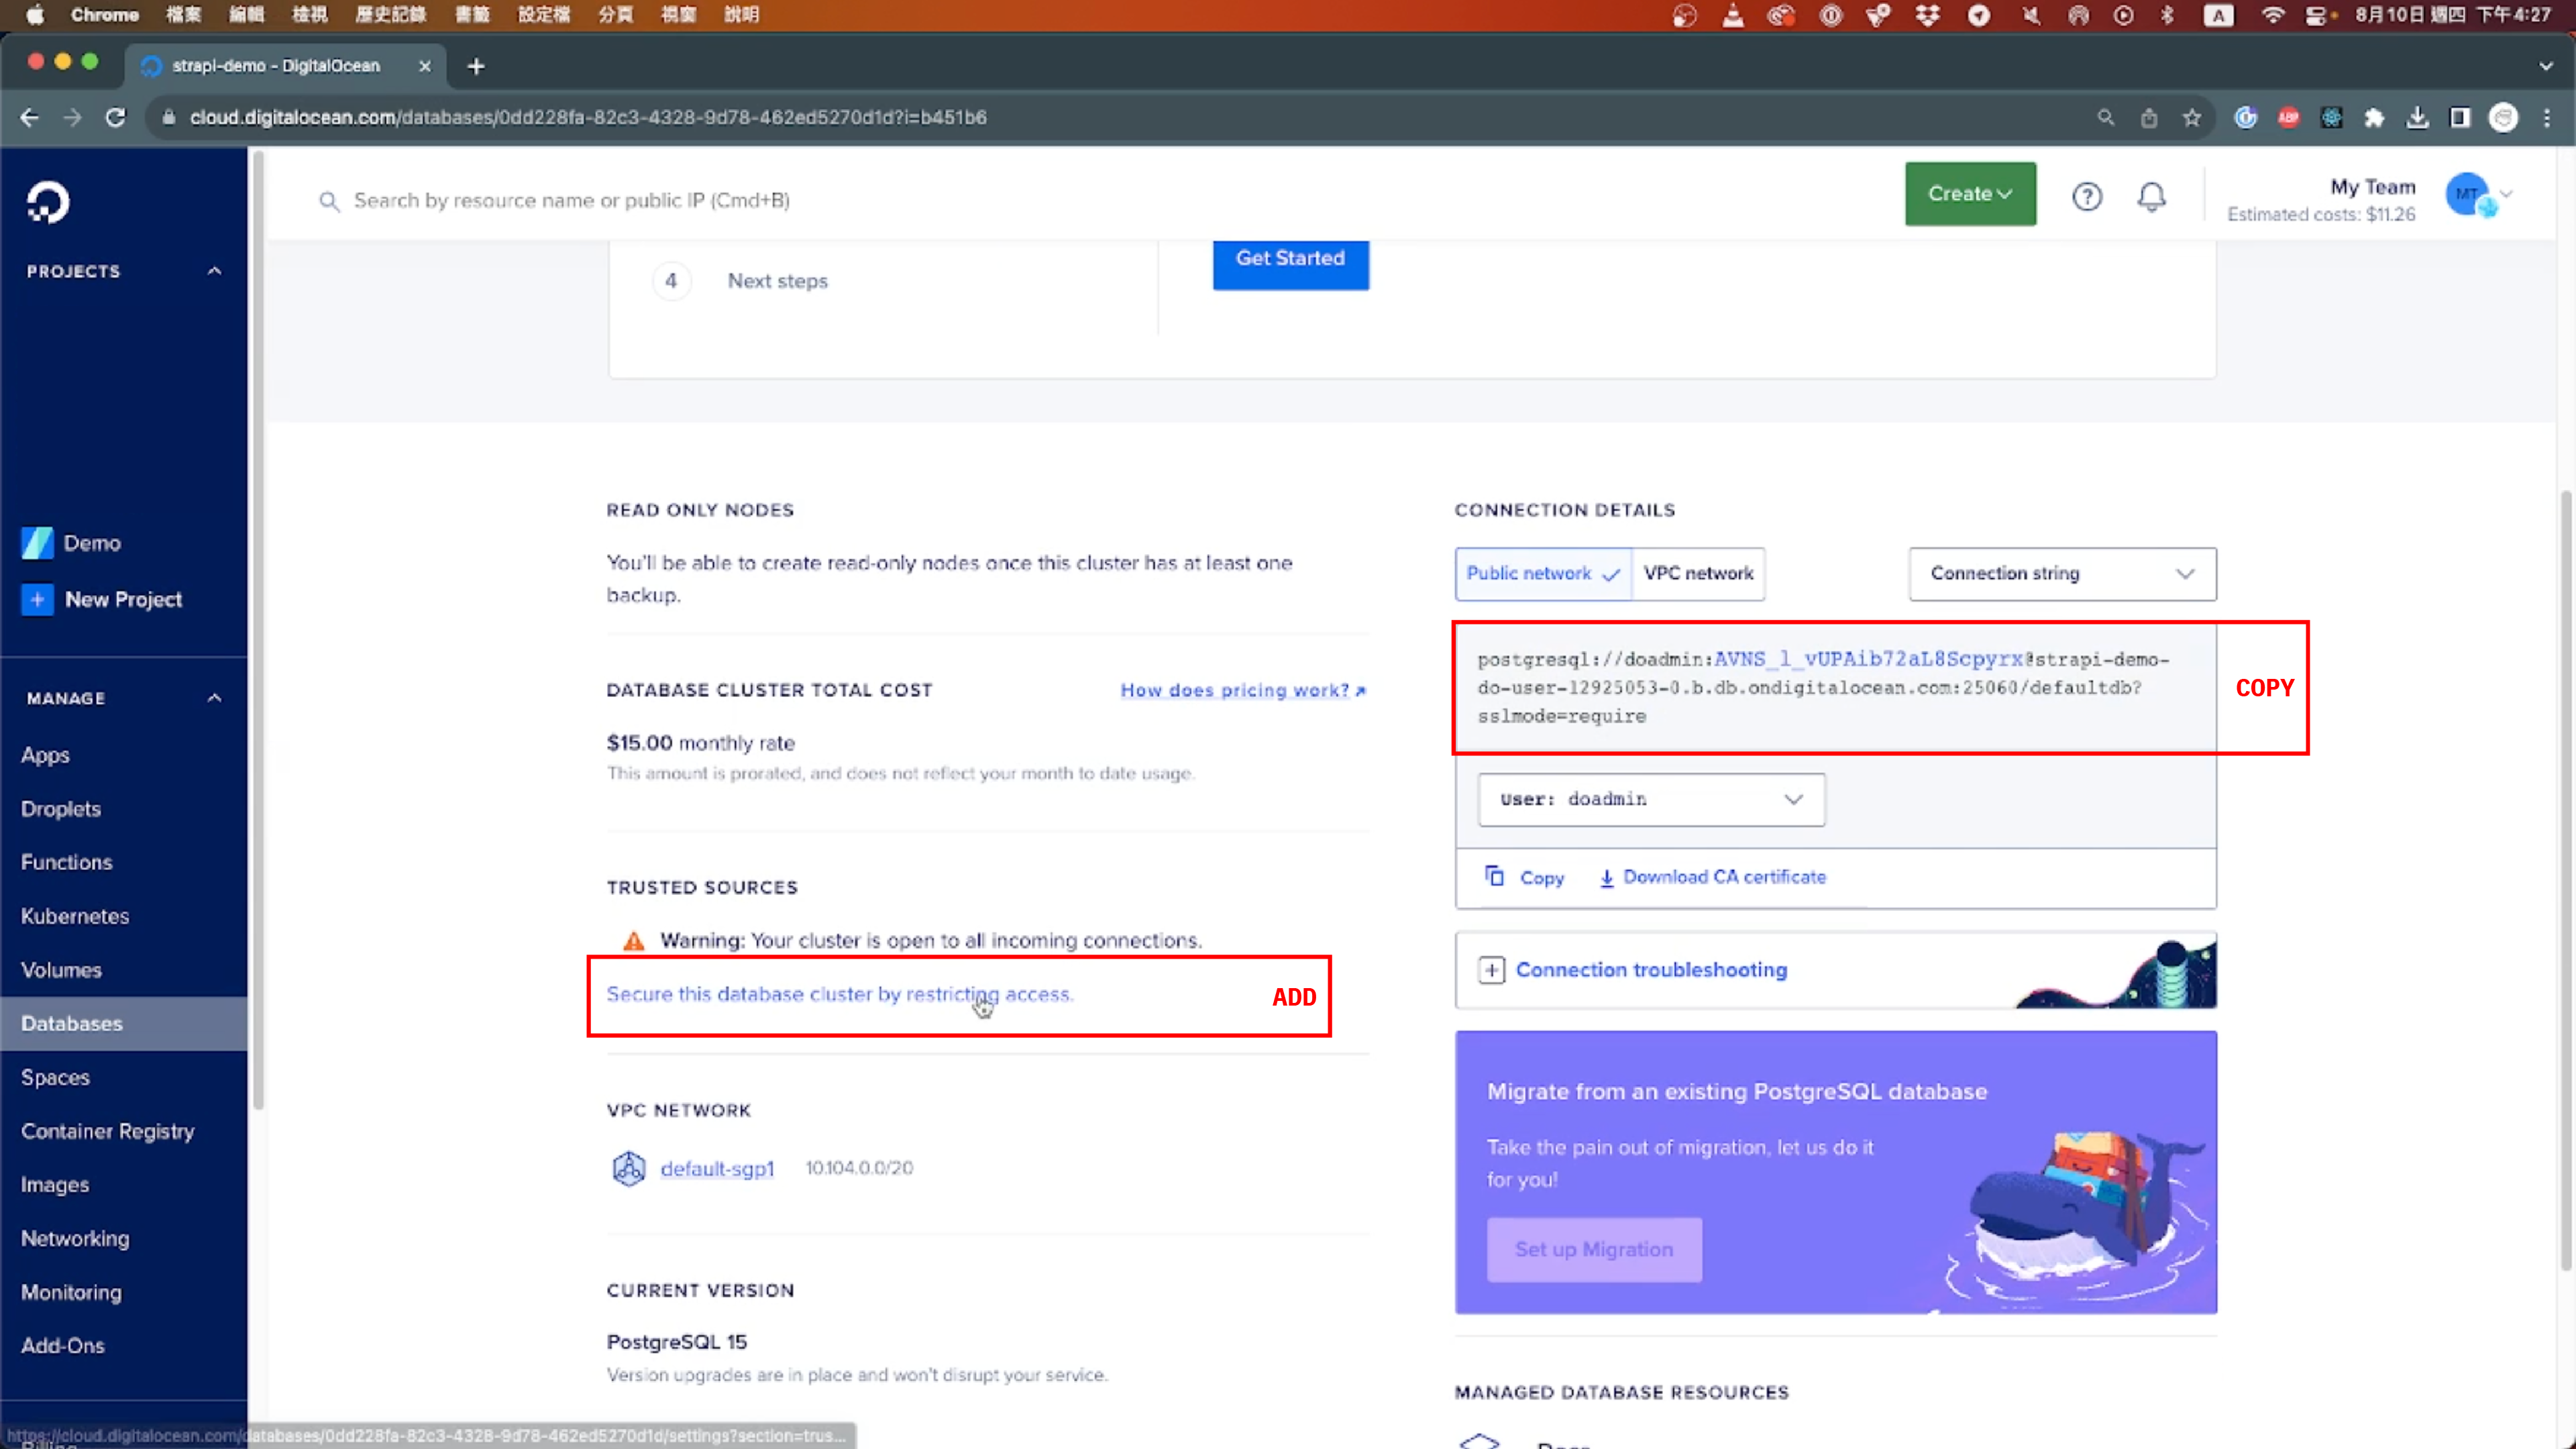
Once you've clicked the Create Database Cluster button, you'll be directed to the information page specific to the database. Please note that the creation process will take some time. During this waiting period, there are a few tasks you can undertake. Firstly, make necessary adjustments to the .env file according to your project's requirements.
# Database DATABASE_URL=<YOUR DATABASE URL> DATABASE_CA=${<YOUR DATABASE NAME>.CA_CERT}
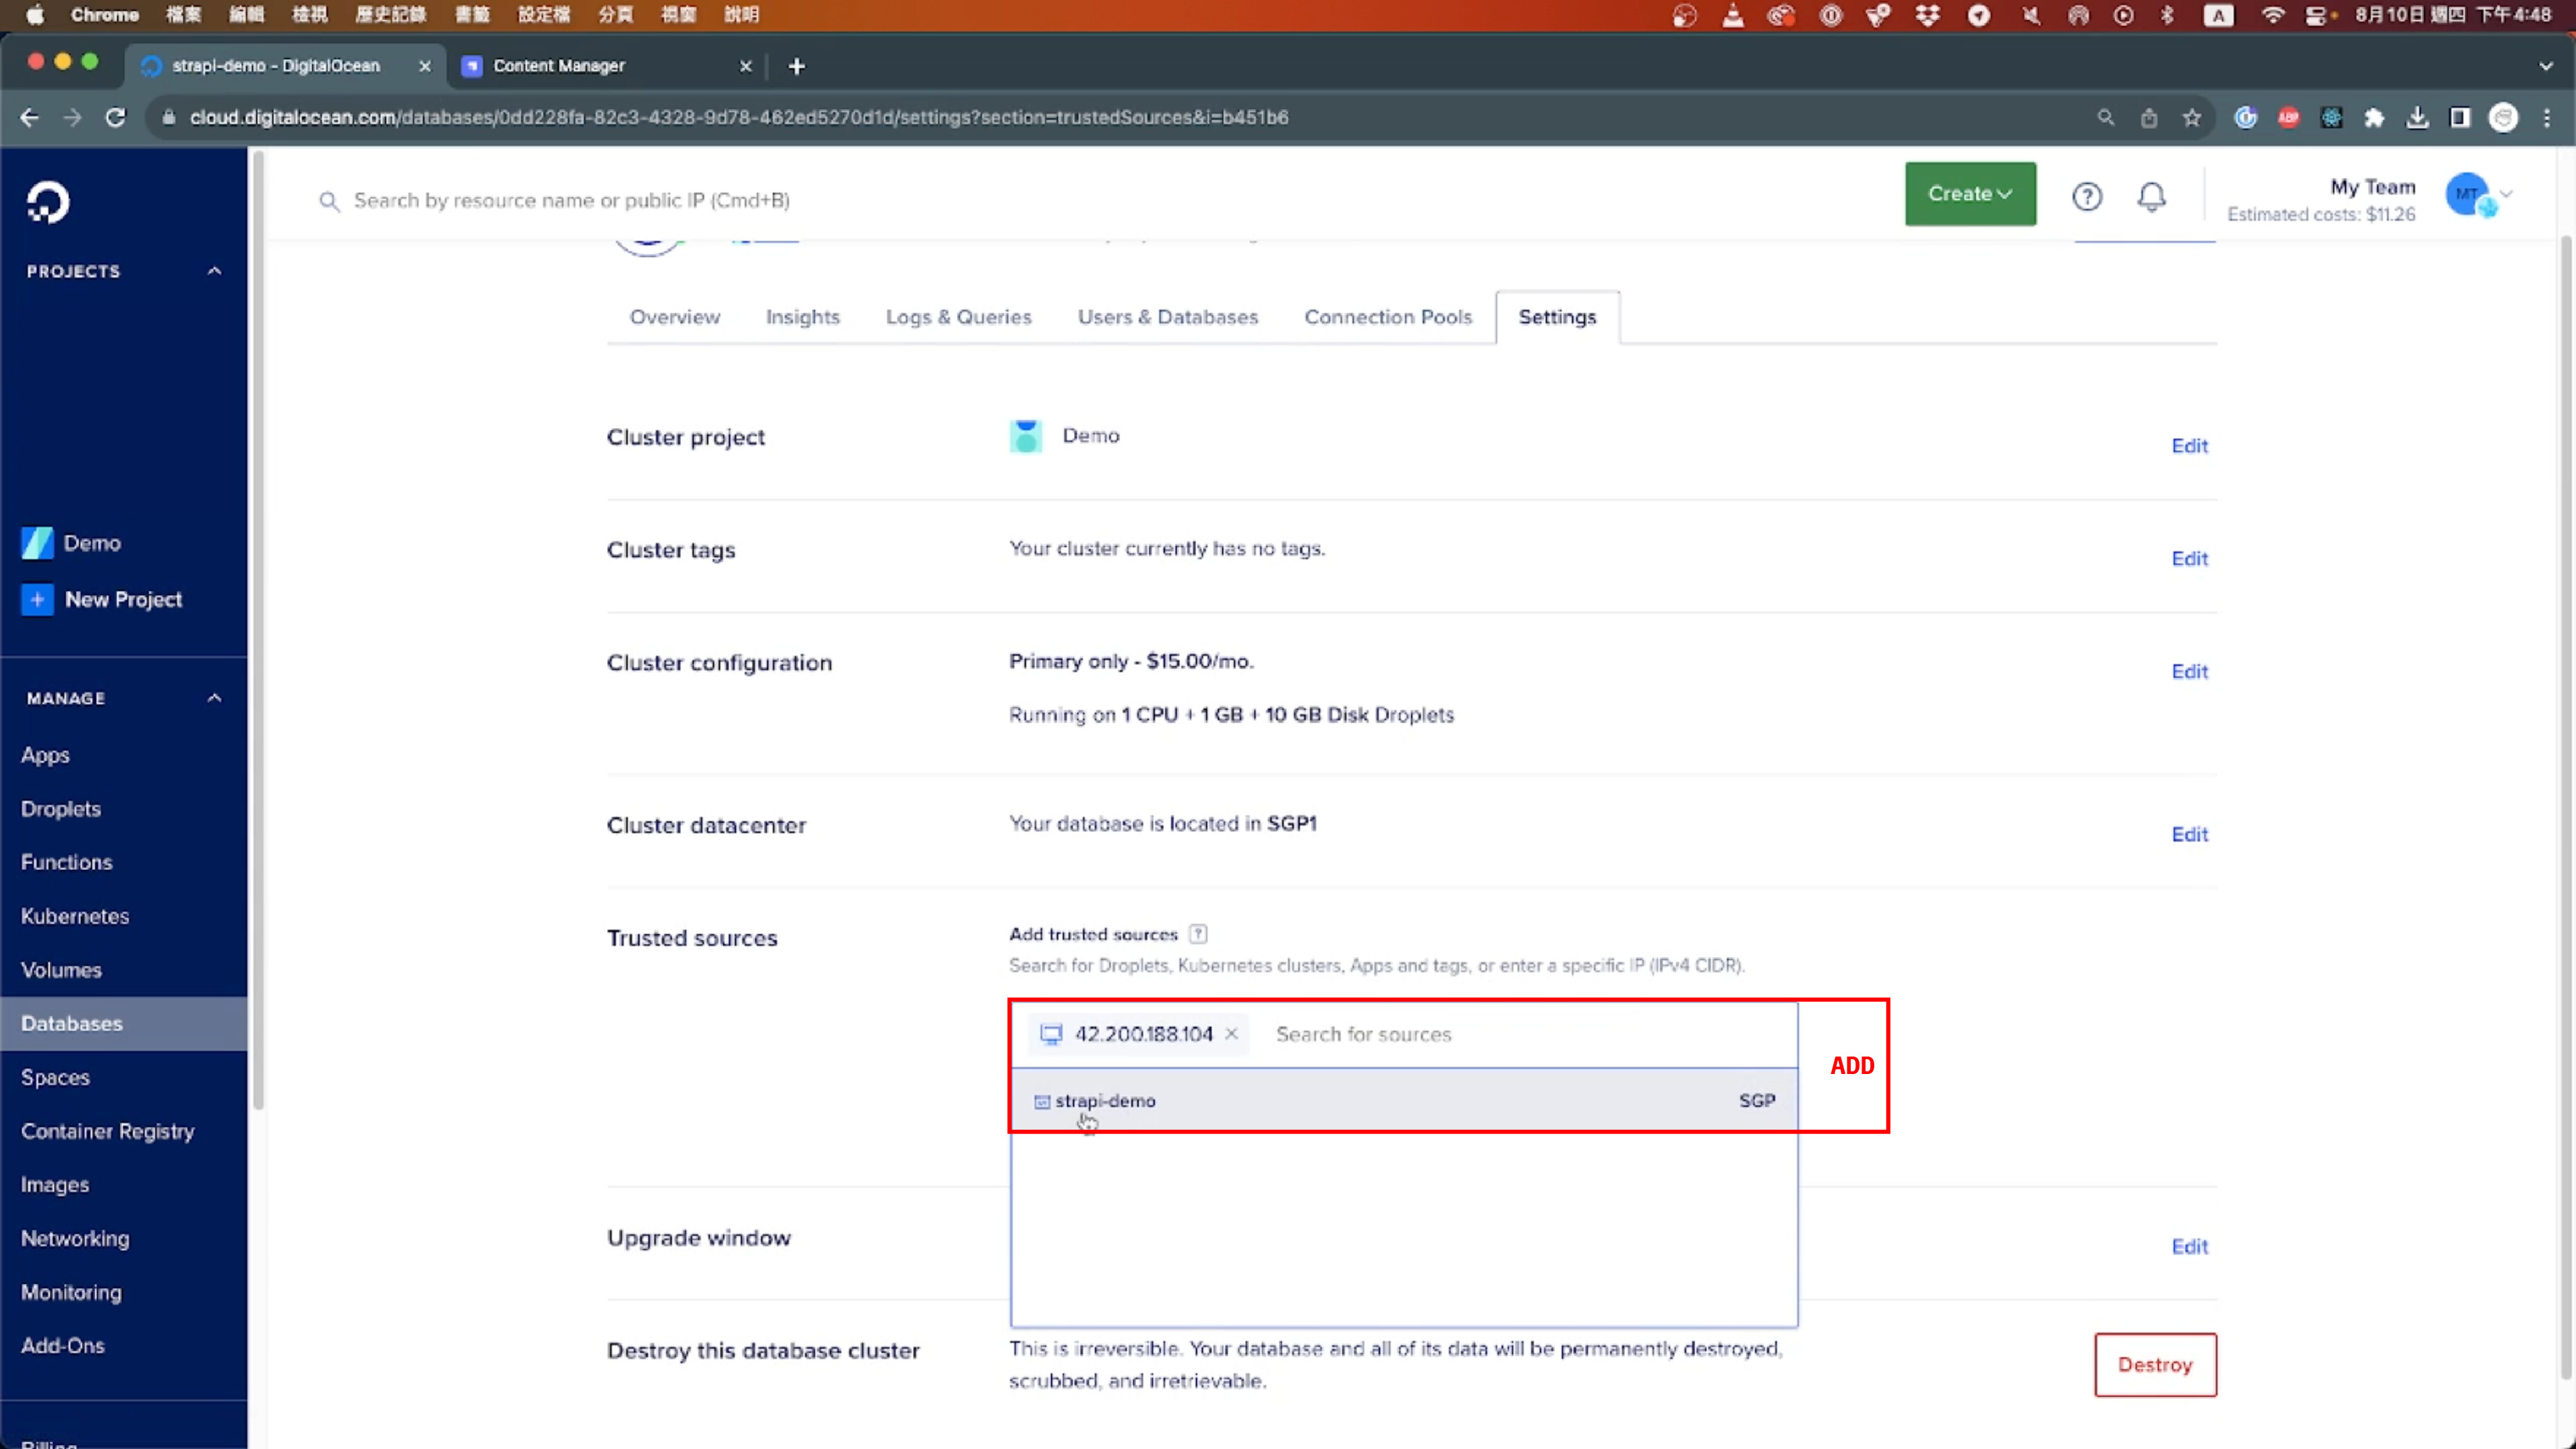
Additionally, it's important to establish trusted sources for device connections to ensure secure access to your database. For this purpose, select Your current computer's IP (XX.XXX.XXX.XXX).
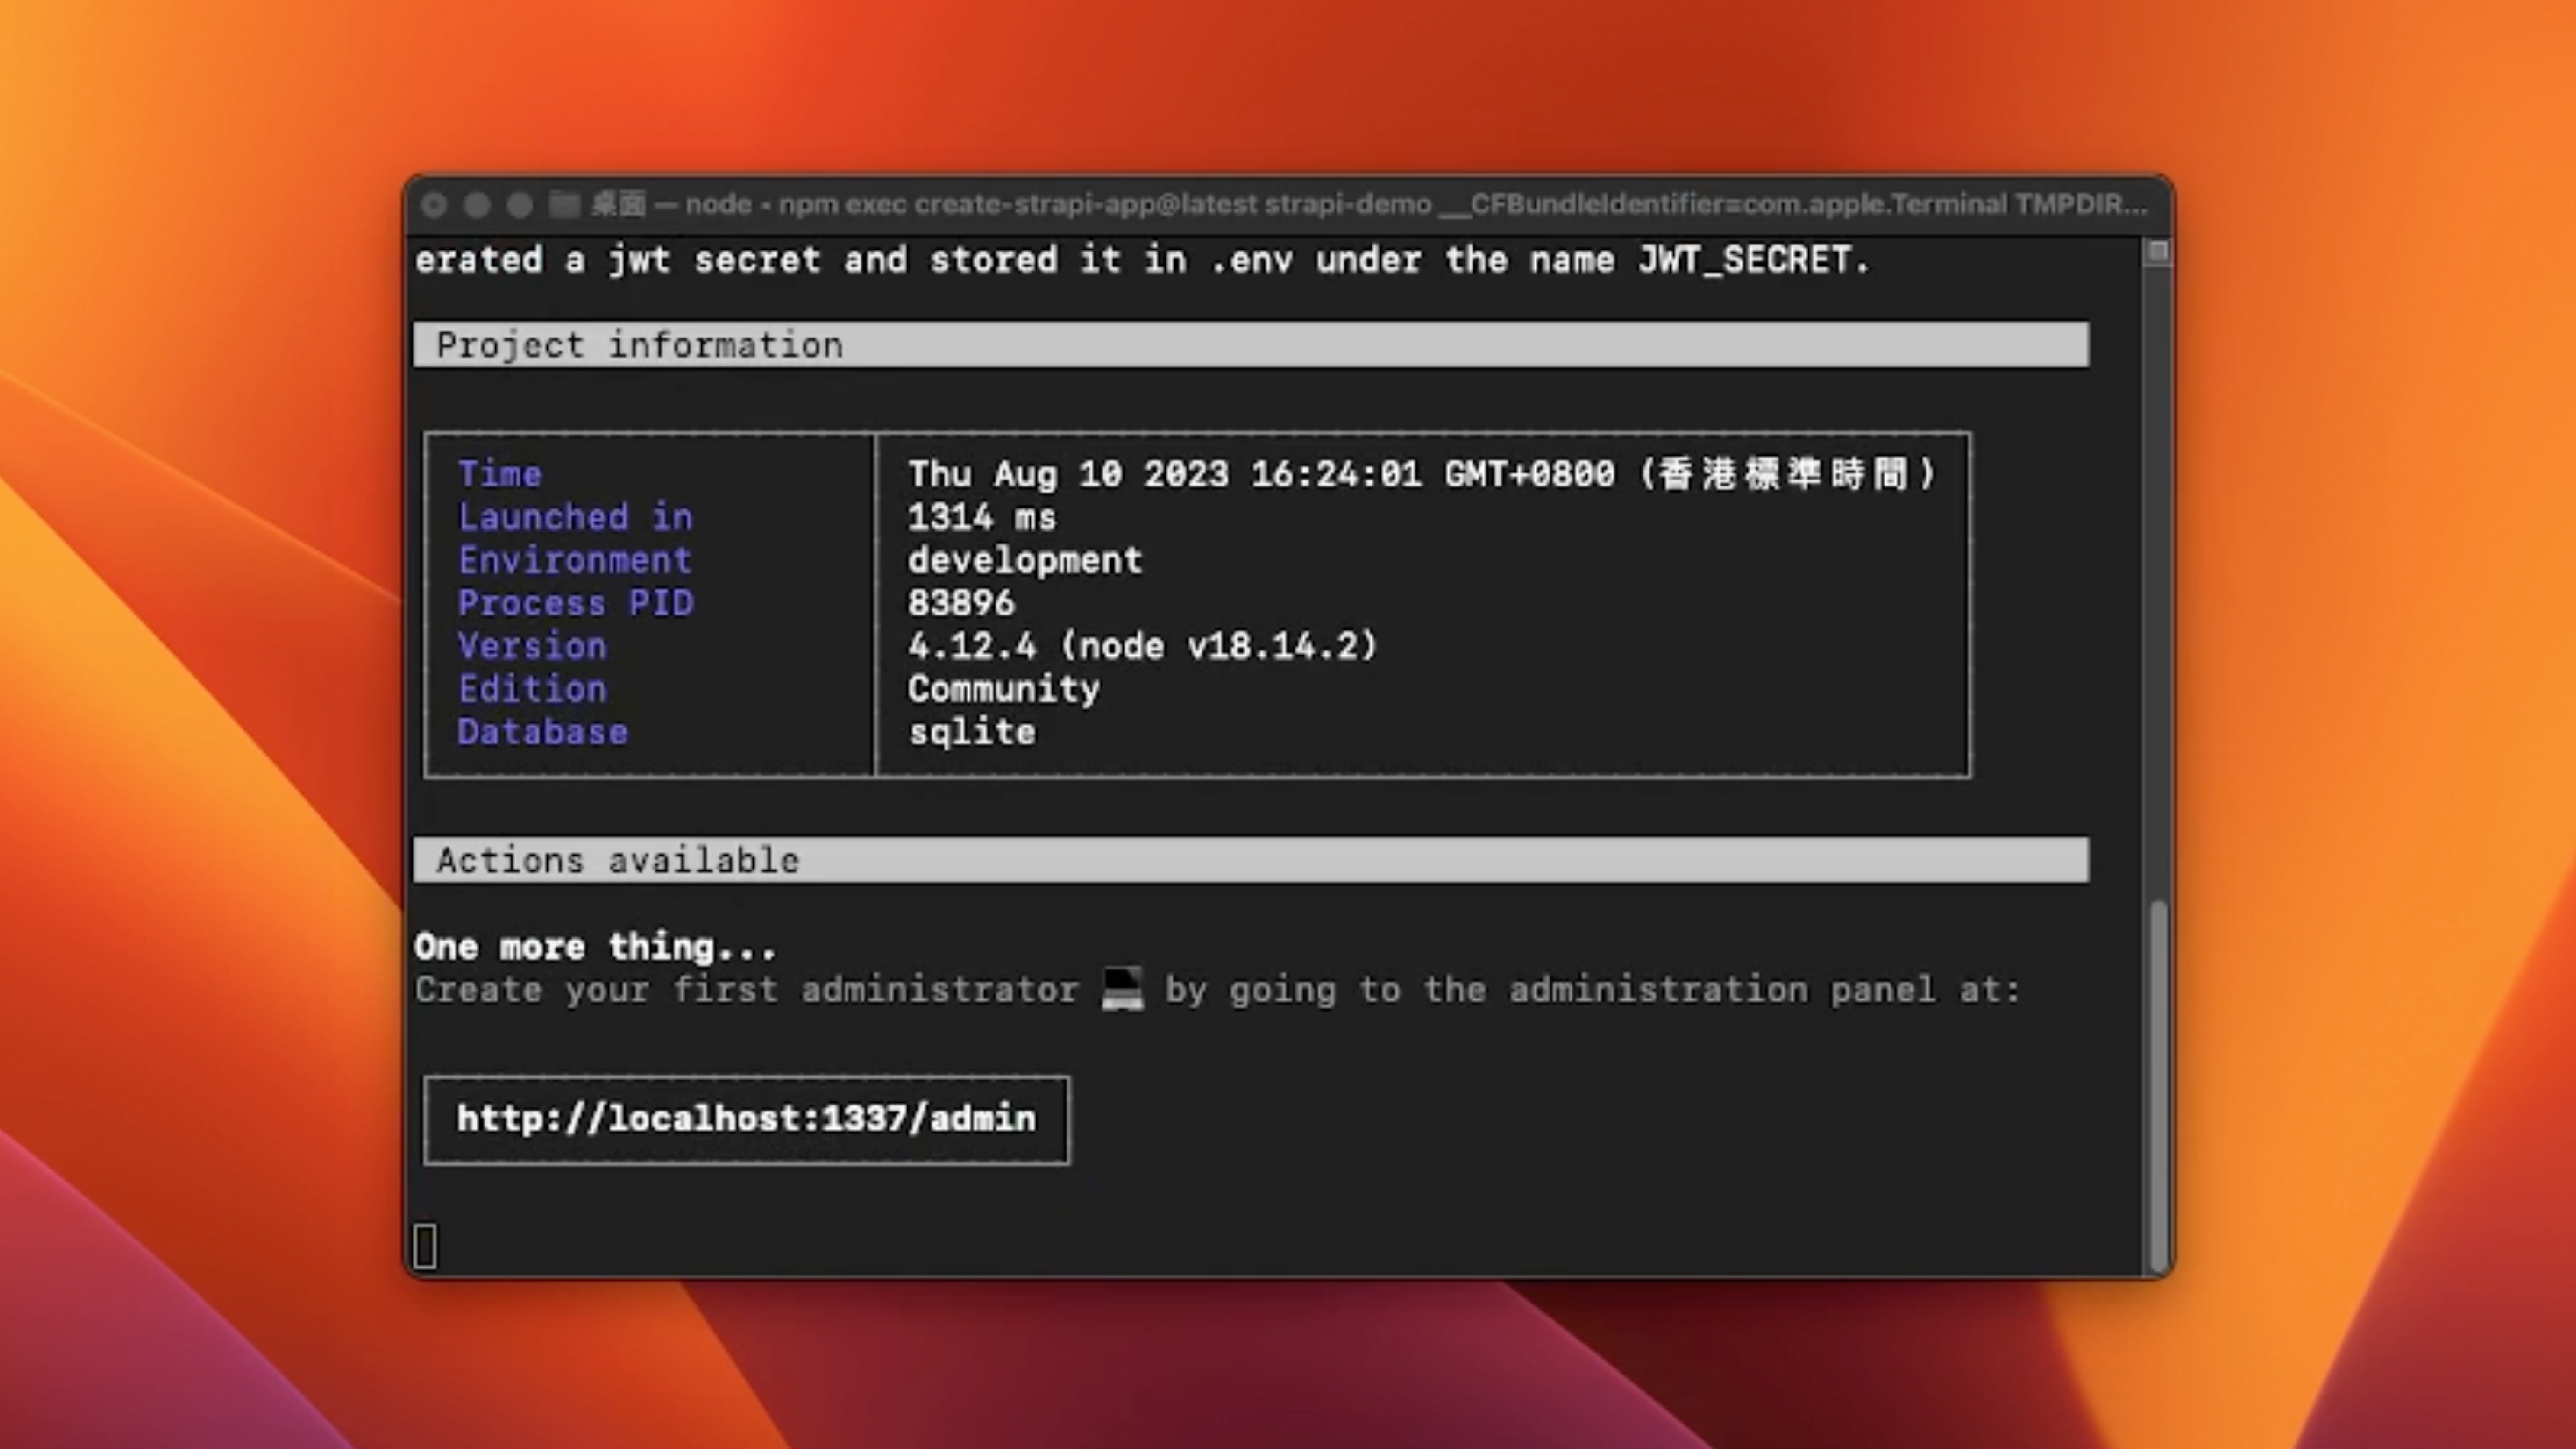
With these steps completed, your local Strapi CMS is now successfully connected to your database. Once the database is successfully established, execute the following commands in your terminal to build and initiate Strapi:
npm run build NODE_ENV=production npm run develop
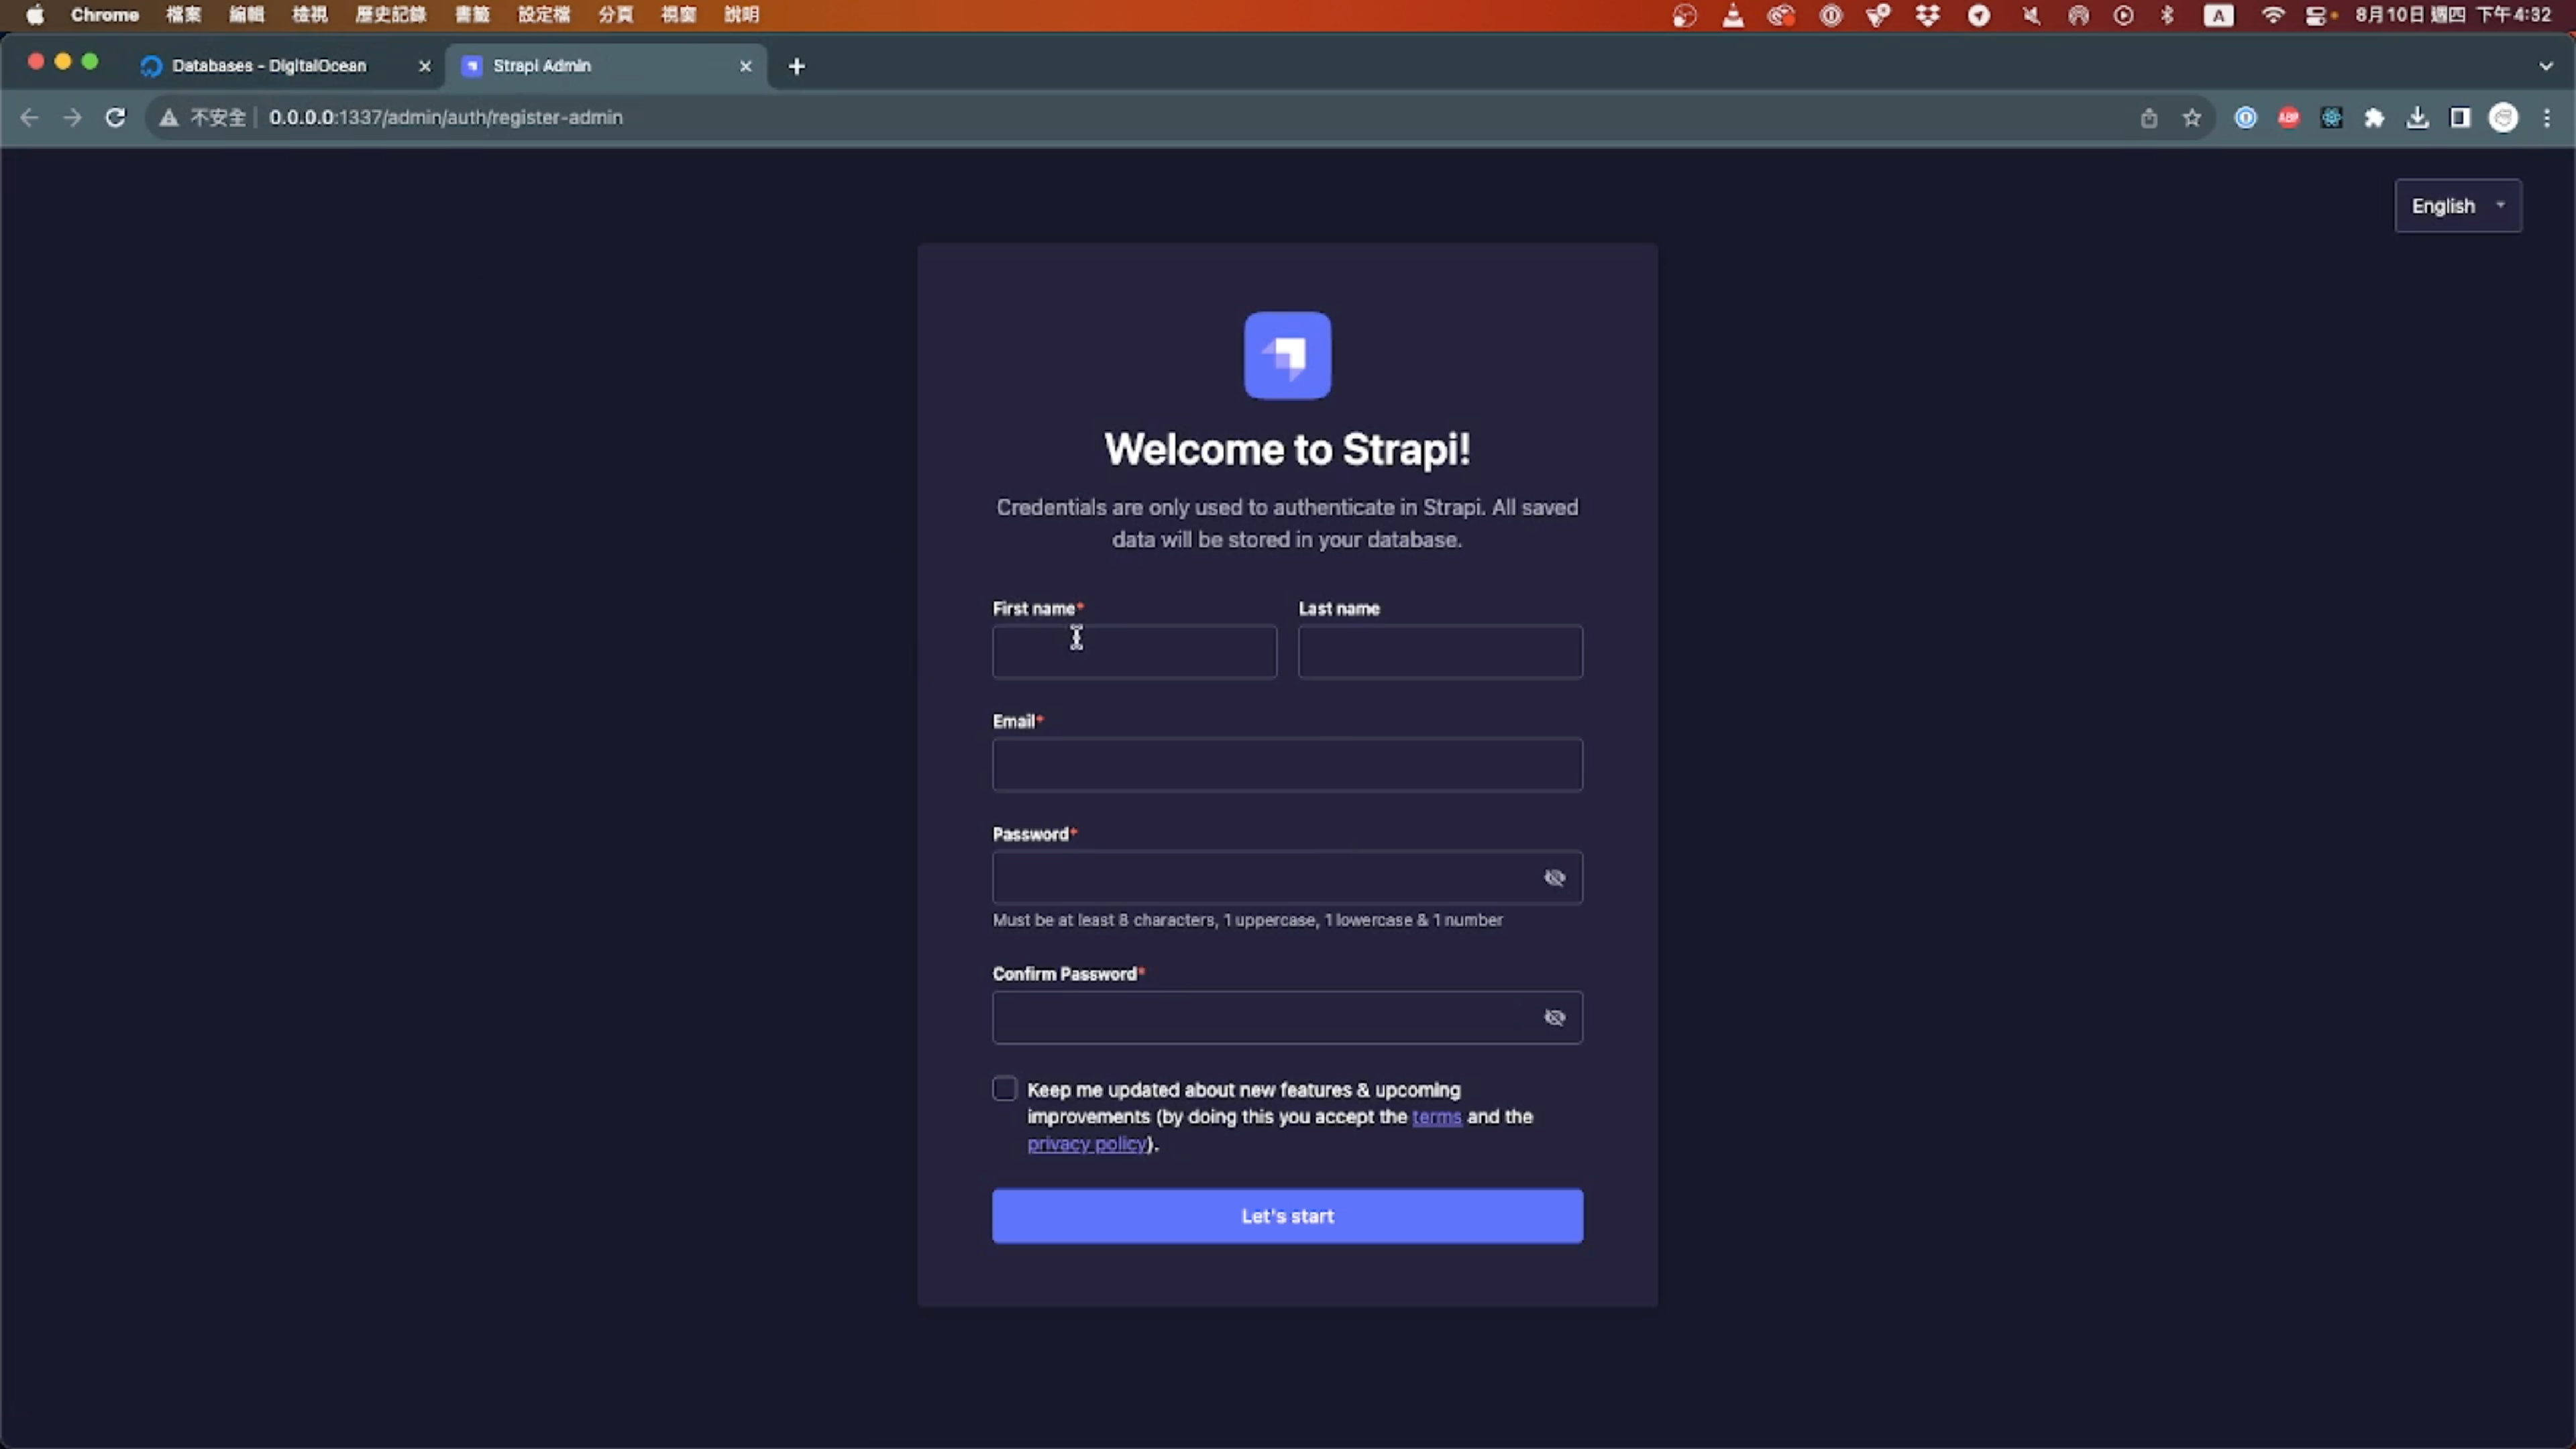
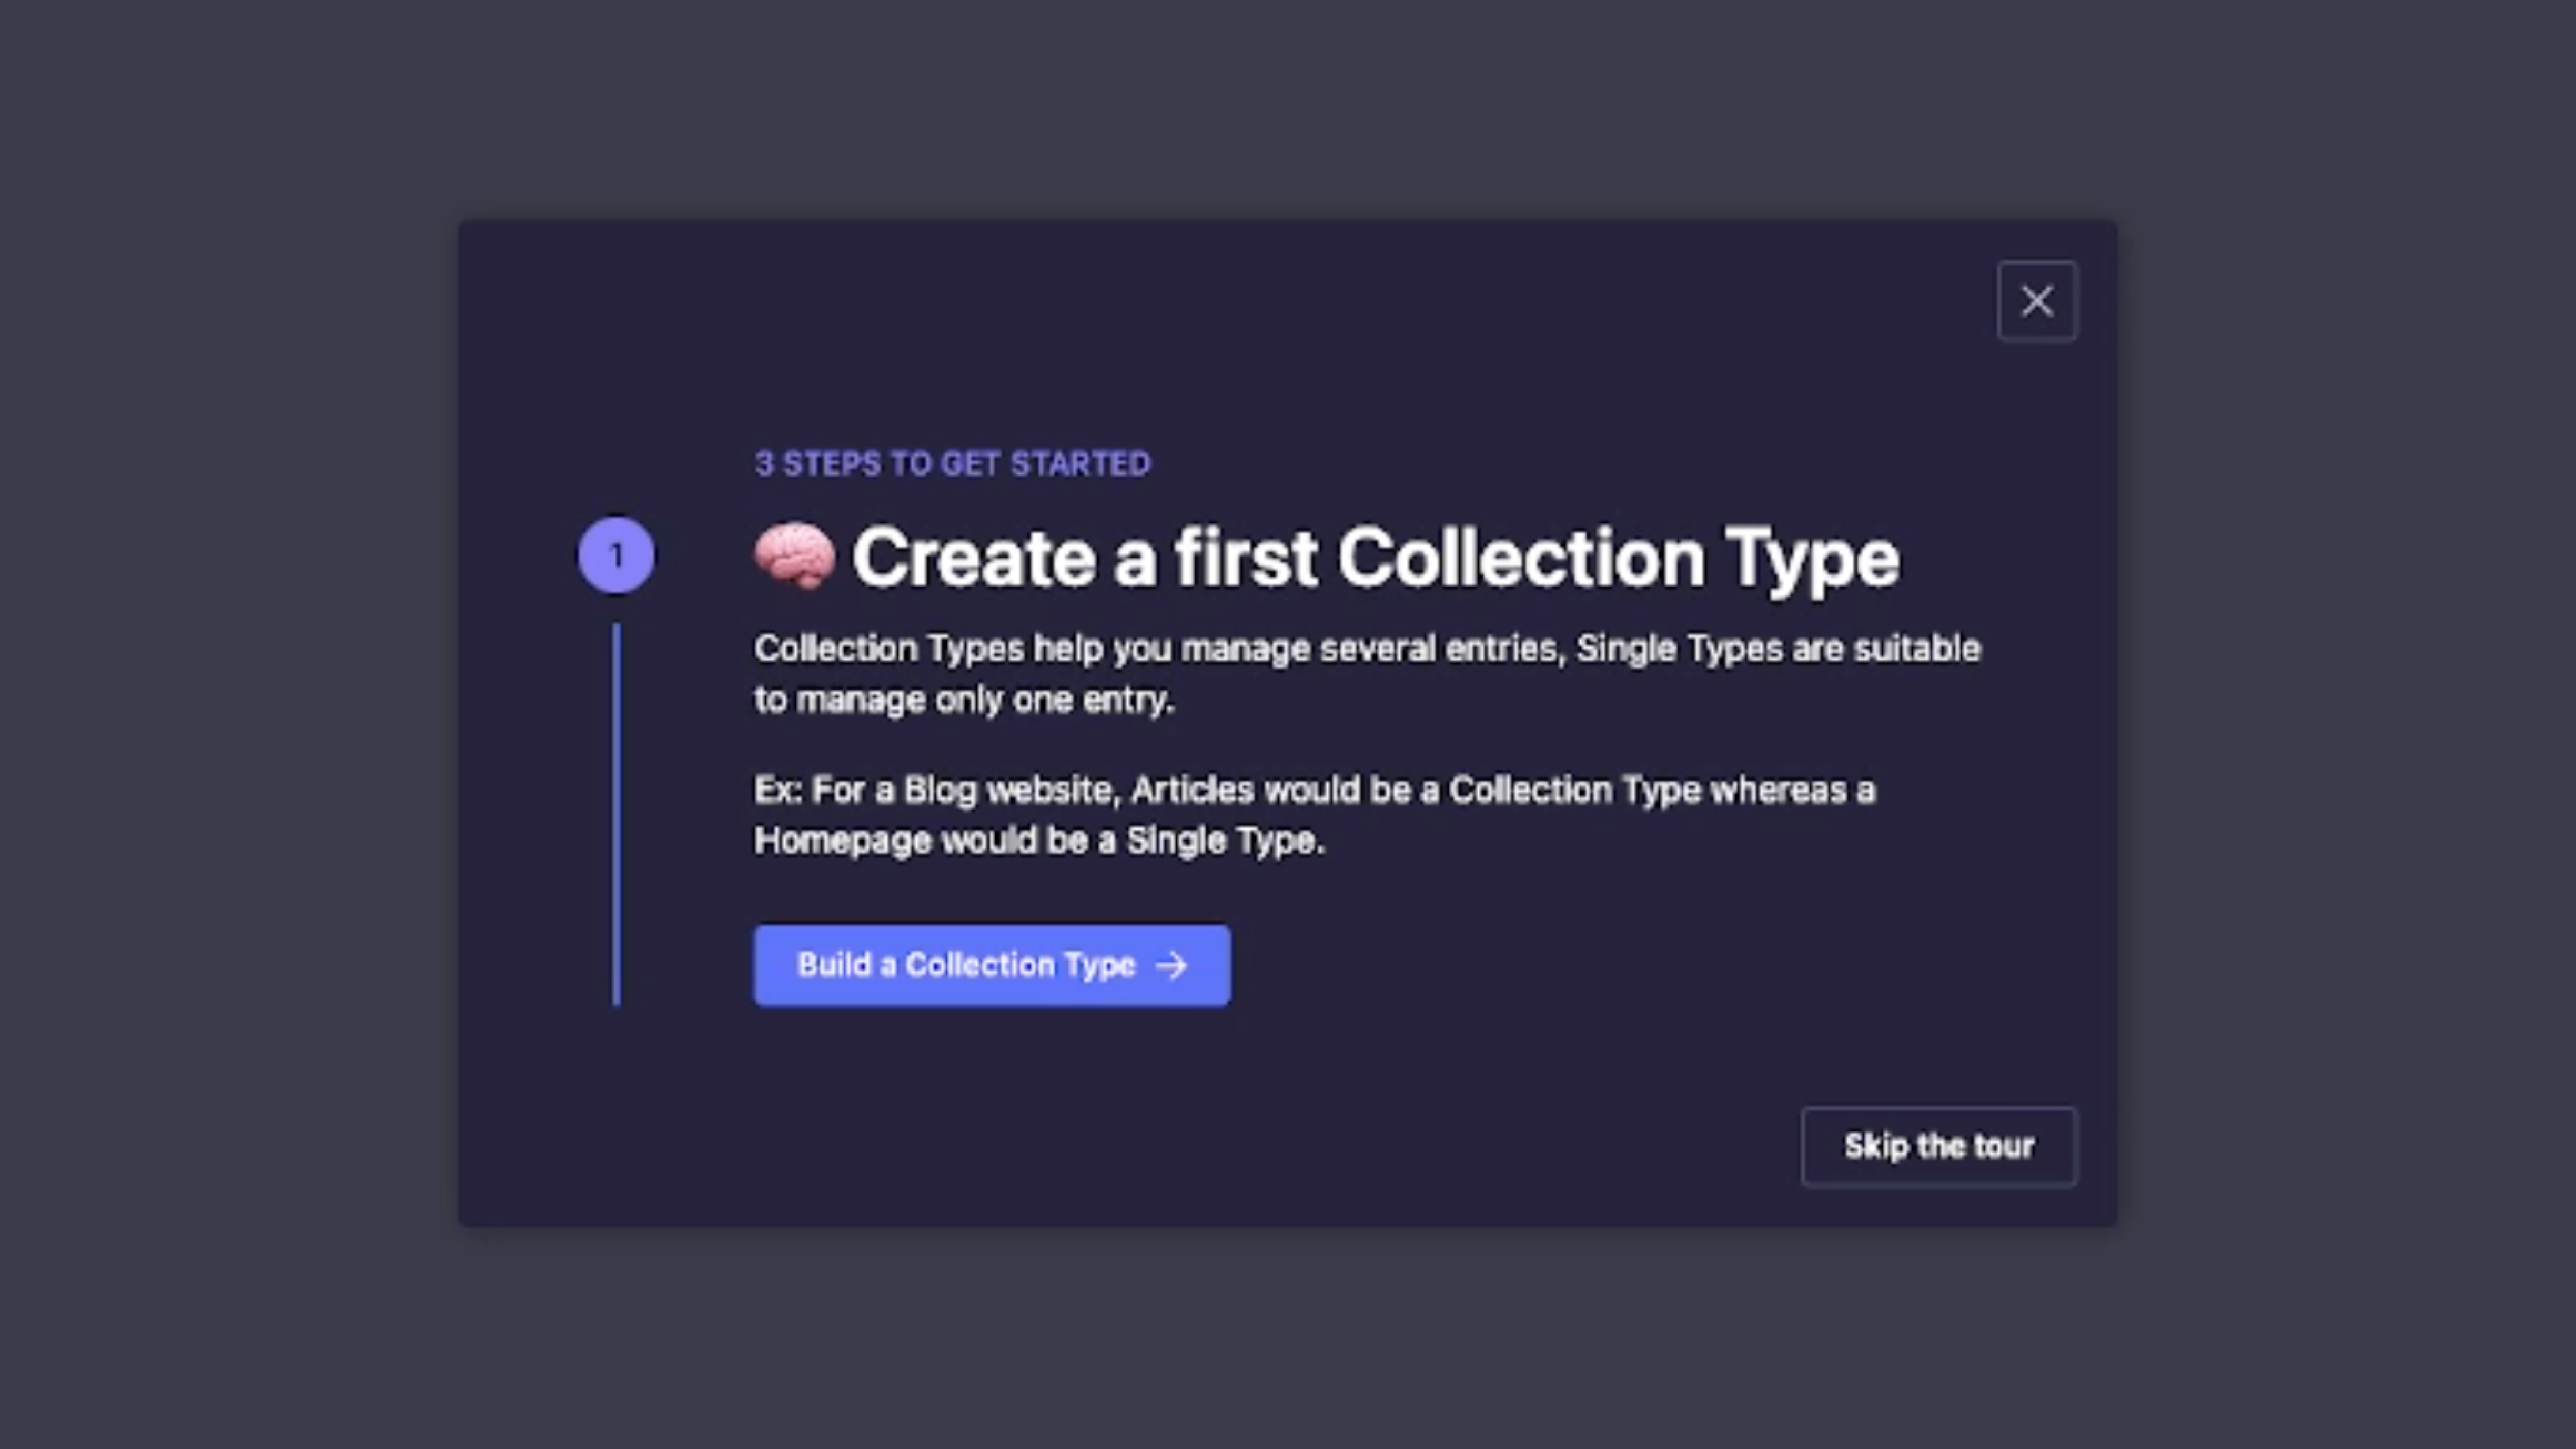
Your Strapi instance is now accessible at http://localhost:1337/. During your initial login, you'll need to set up the administrator credentials. Be sure to remember the login details and password you set. After logging in, you can proceed to establish your first data collection and create your inaugural record.
Once all your configurations and setup are complete, you can publish your Strapi project to GitHub. This will allow you to version control your code and easily collaborate with others if needed.
Return to the DigitalOcean website and follow these steps:
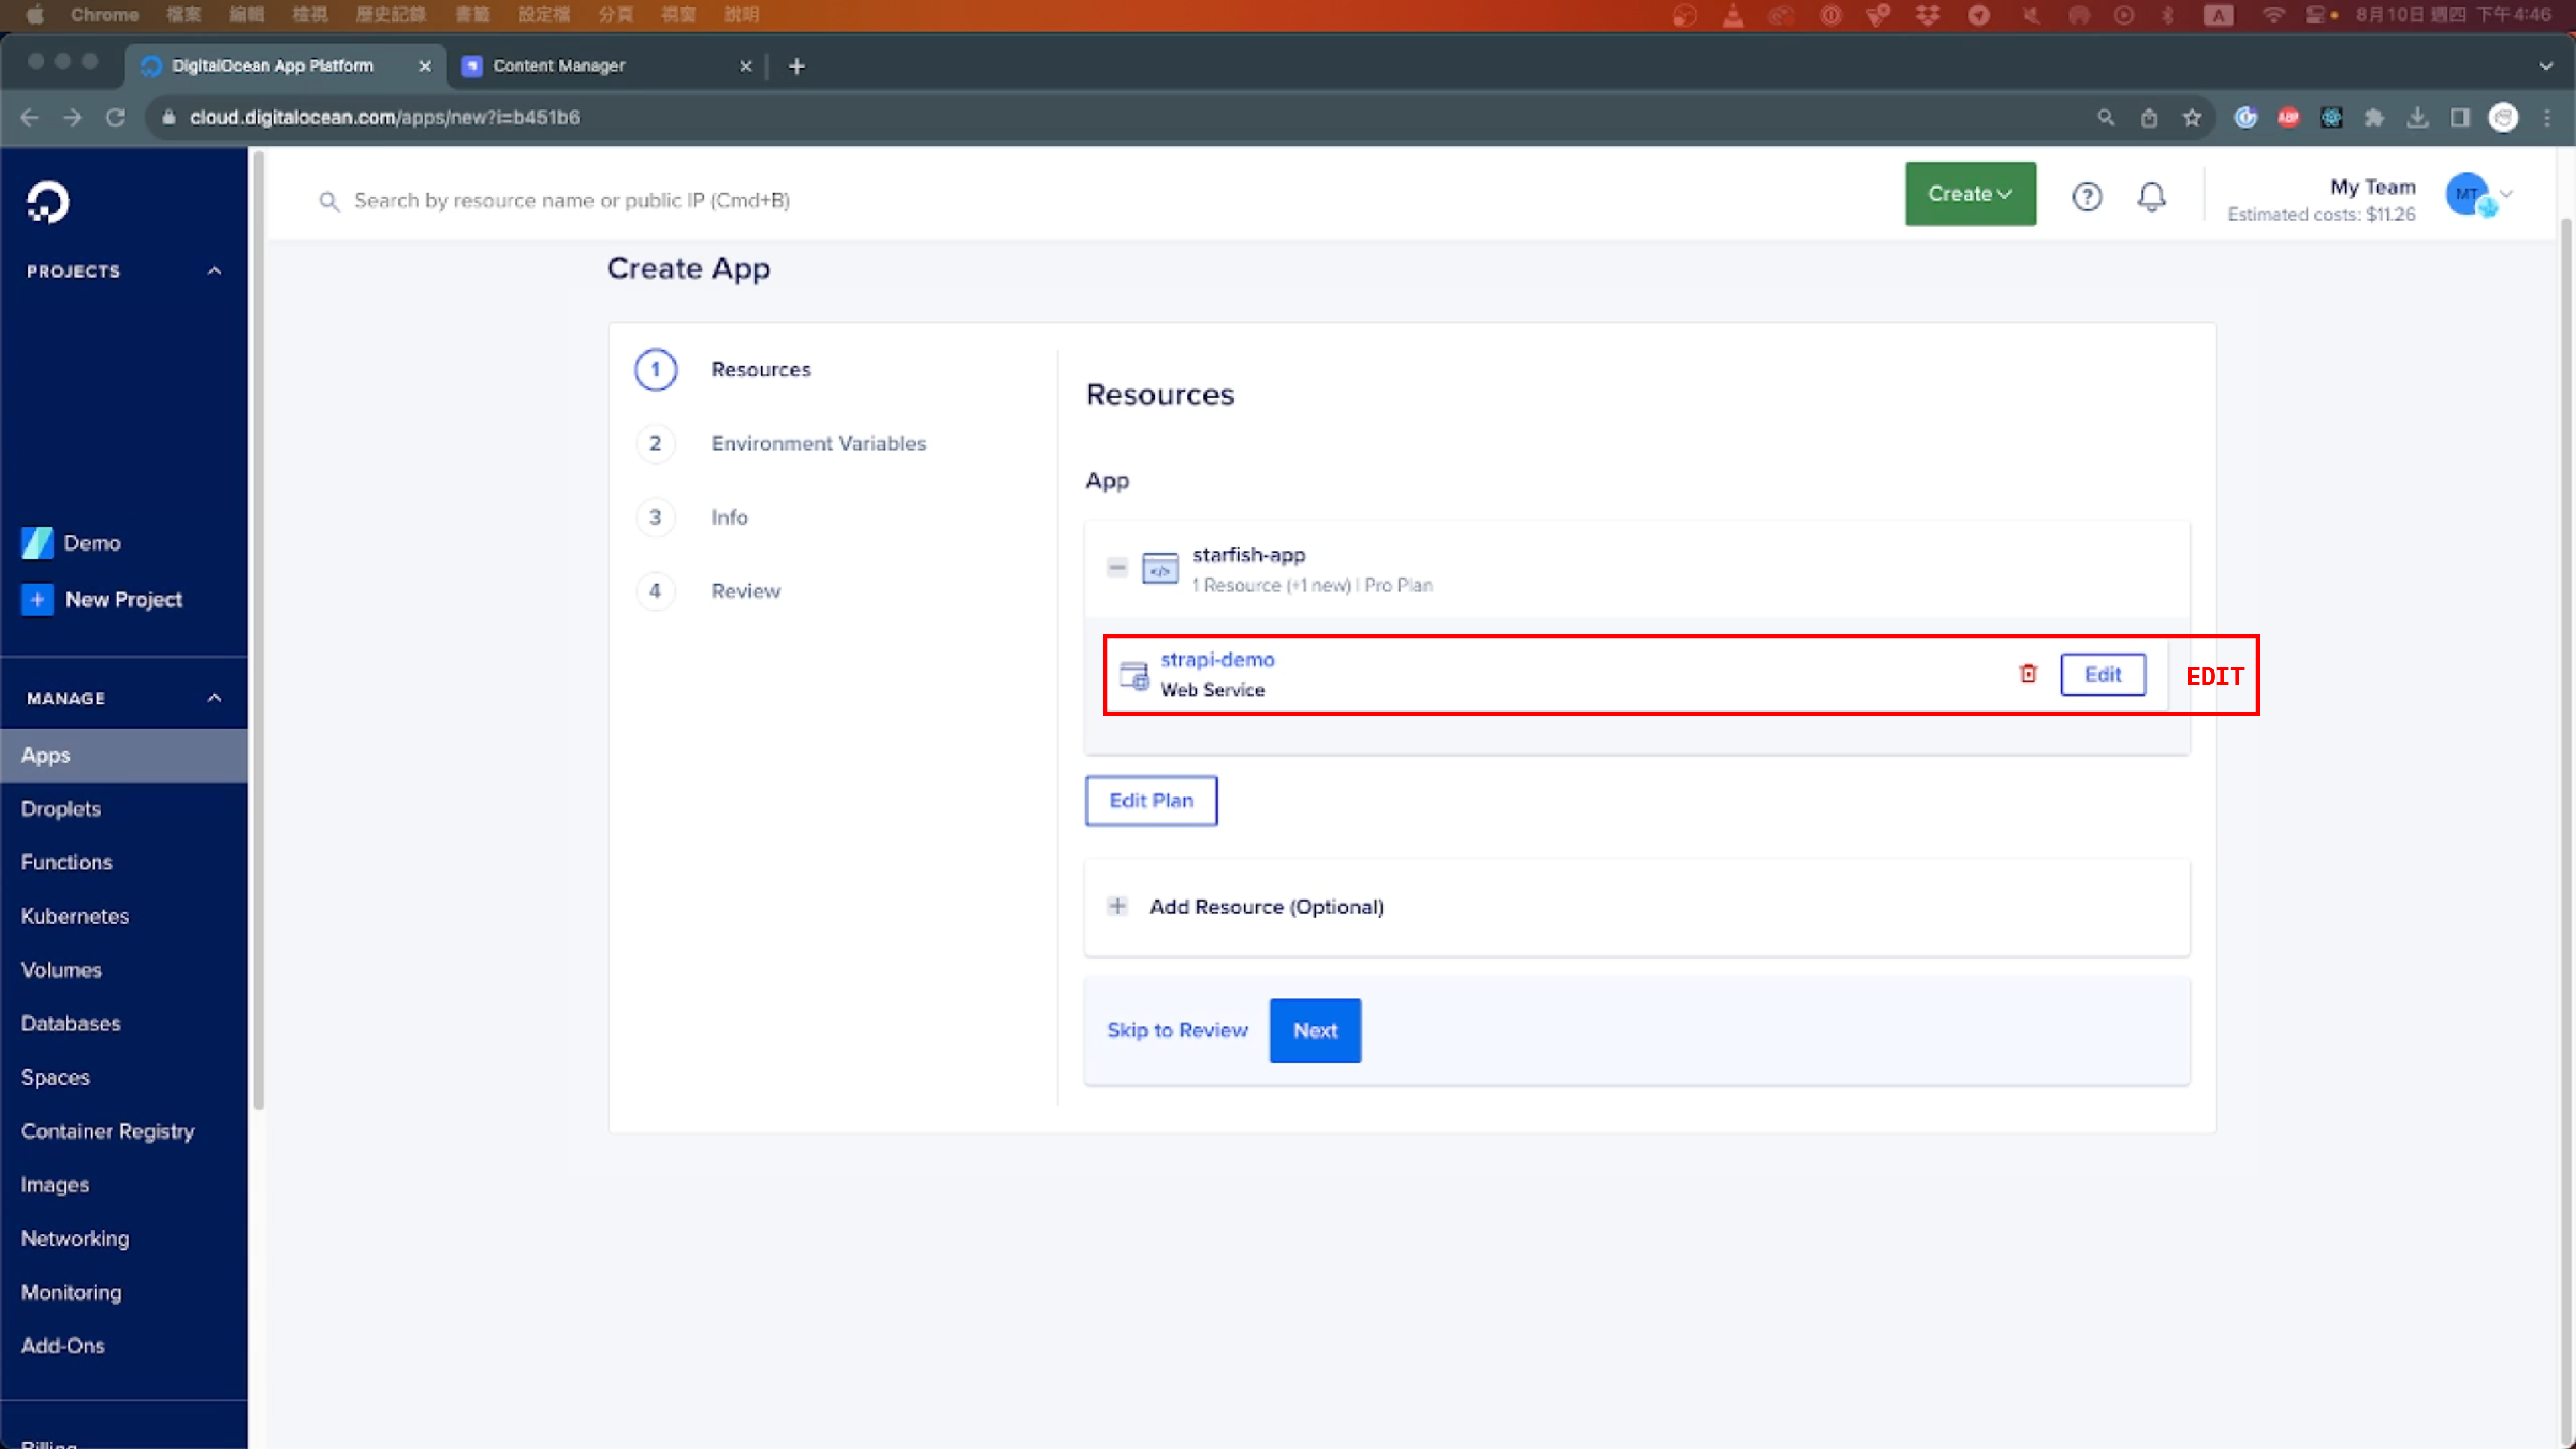
Click on Create, and then navigate to Apps. Choose GitHub as the service provider. If this is your first time using DigitalOcean, you might need to establish a connection to GitHub. Select the repository associated with your Strapi project.
Modify your app setting:
build_command: NODE_ENV=production npm run build run_command: NODE_ENV=production npm start port: 1337
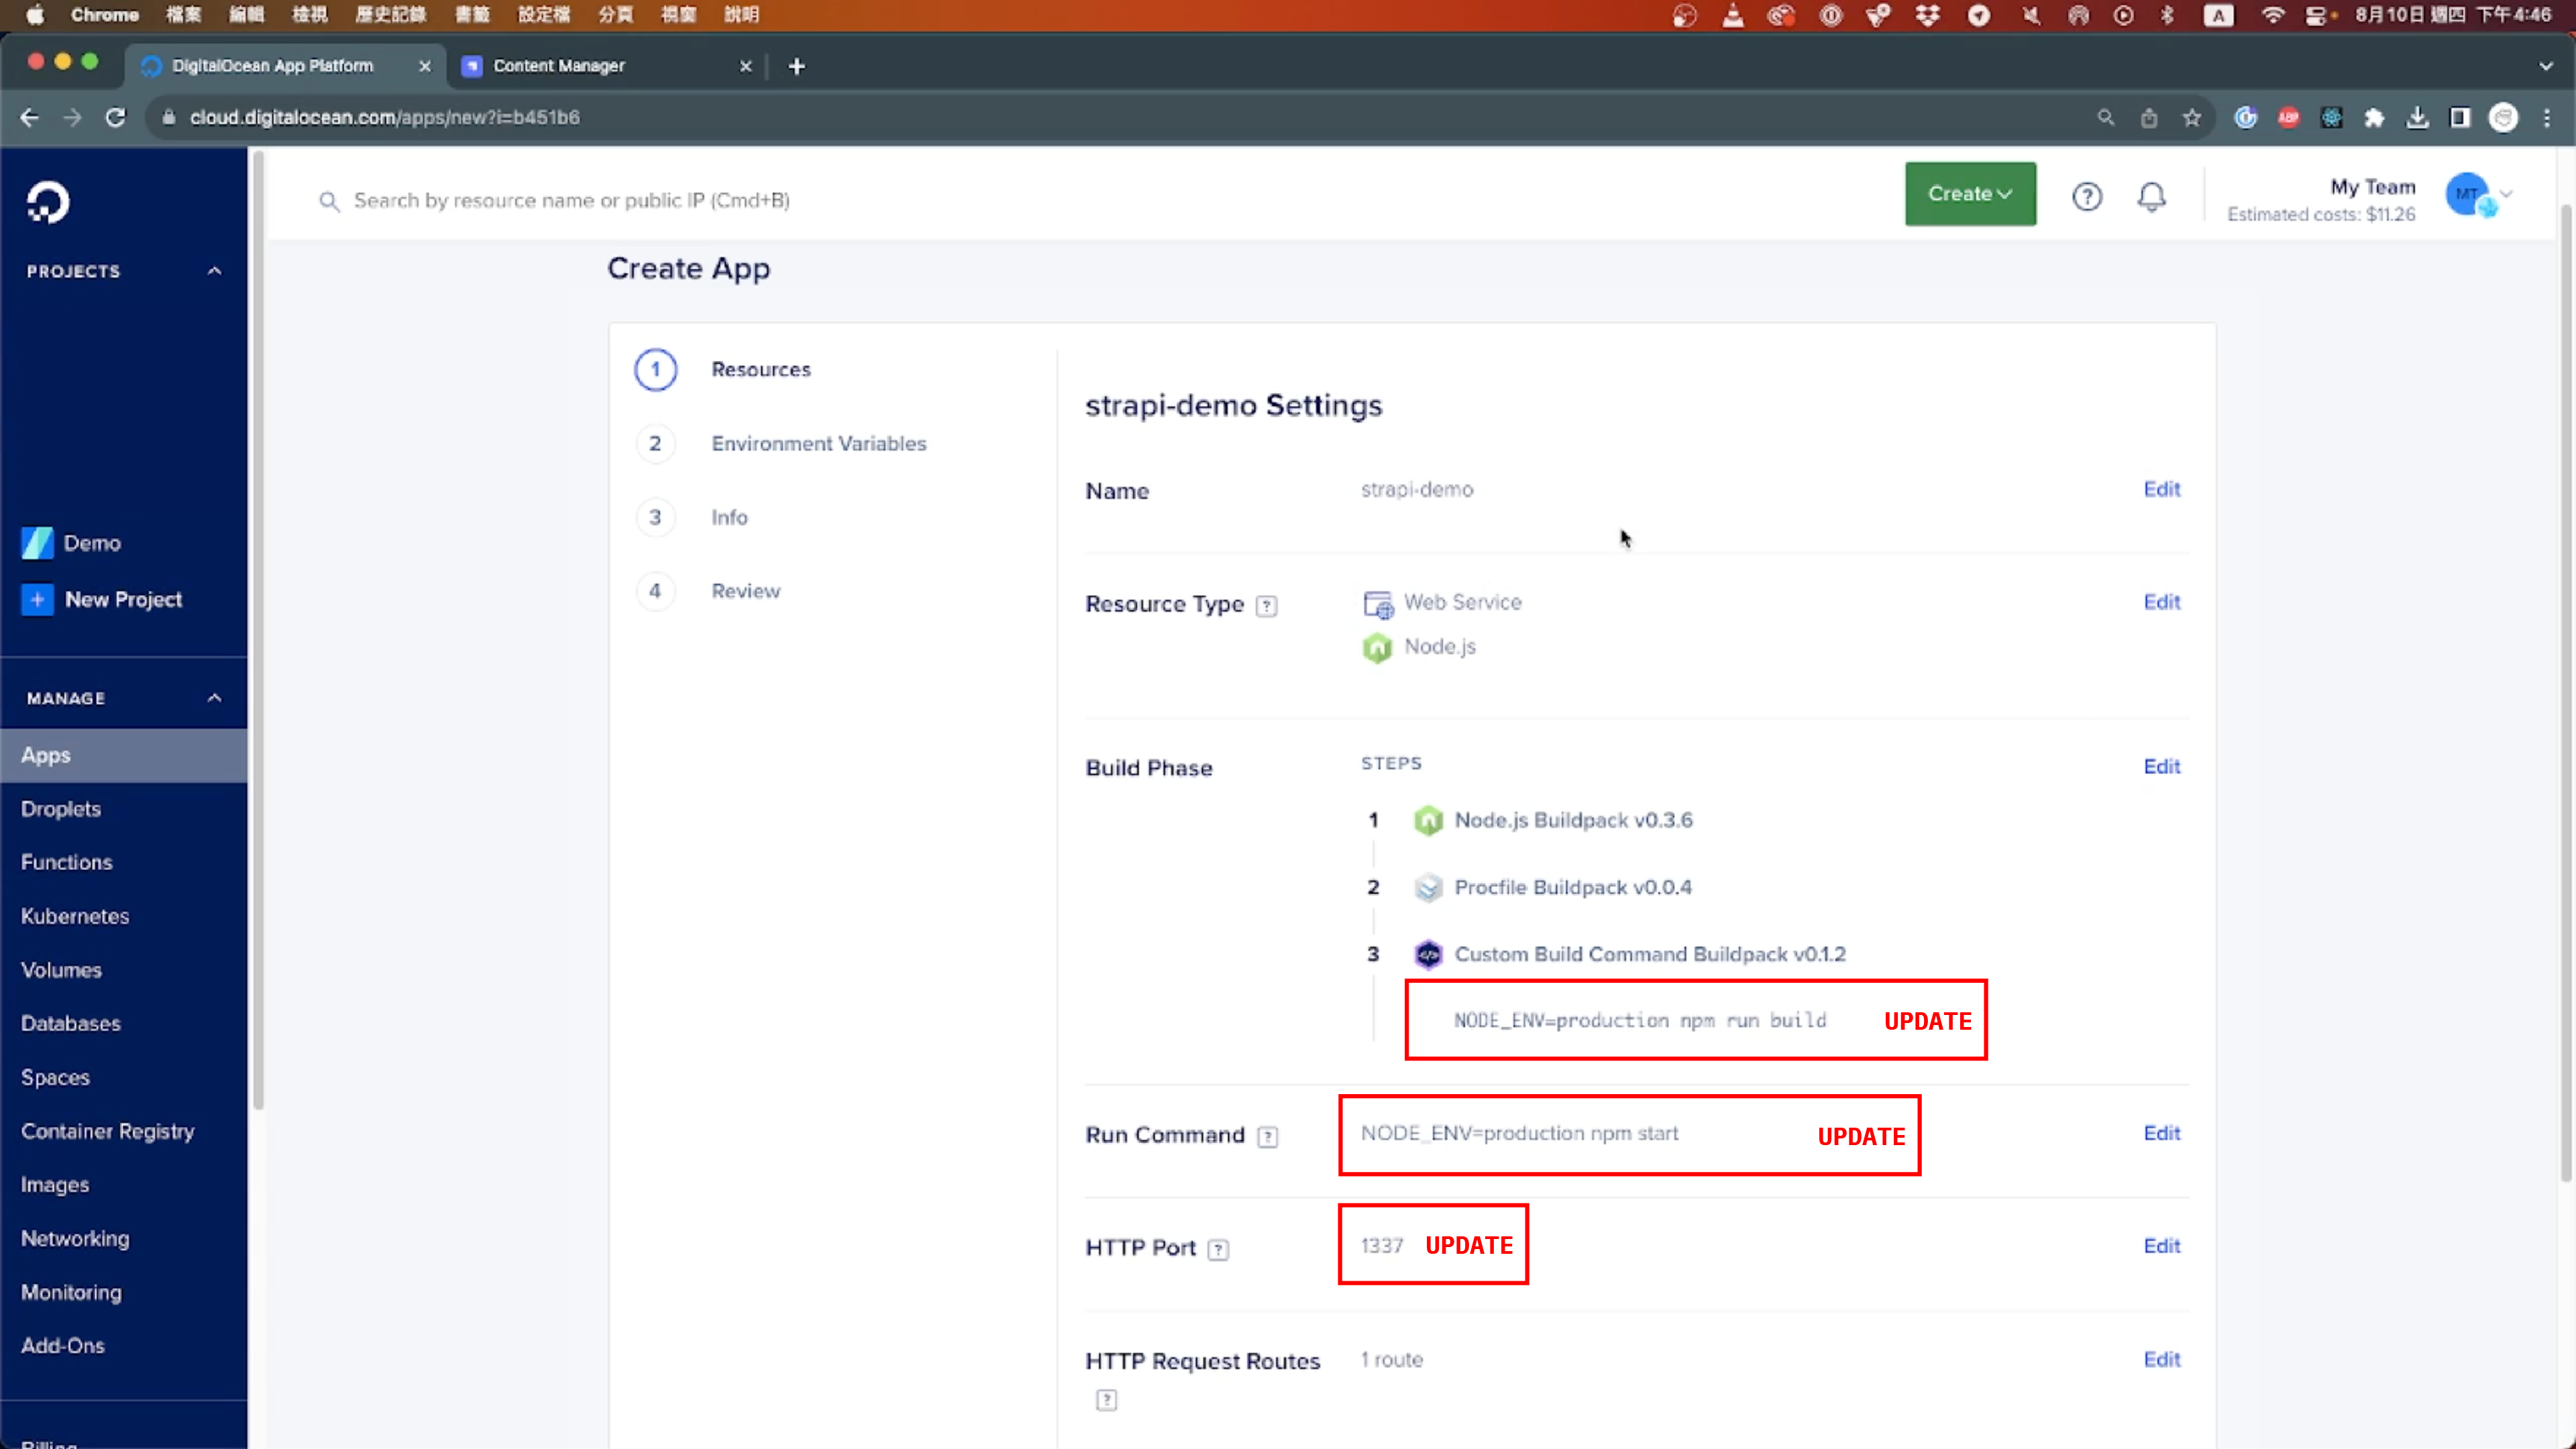
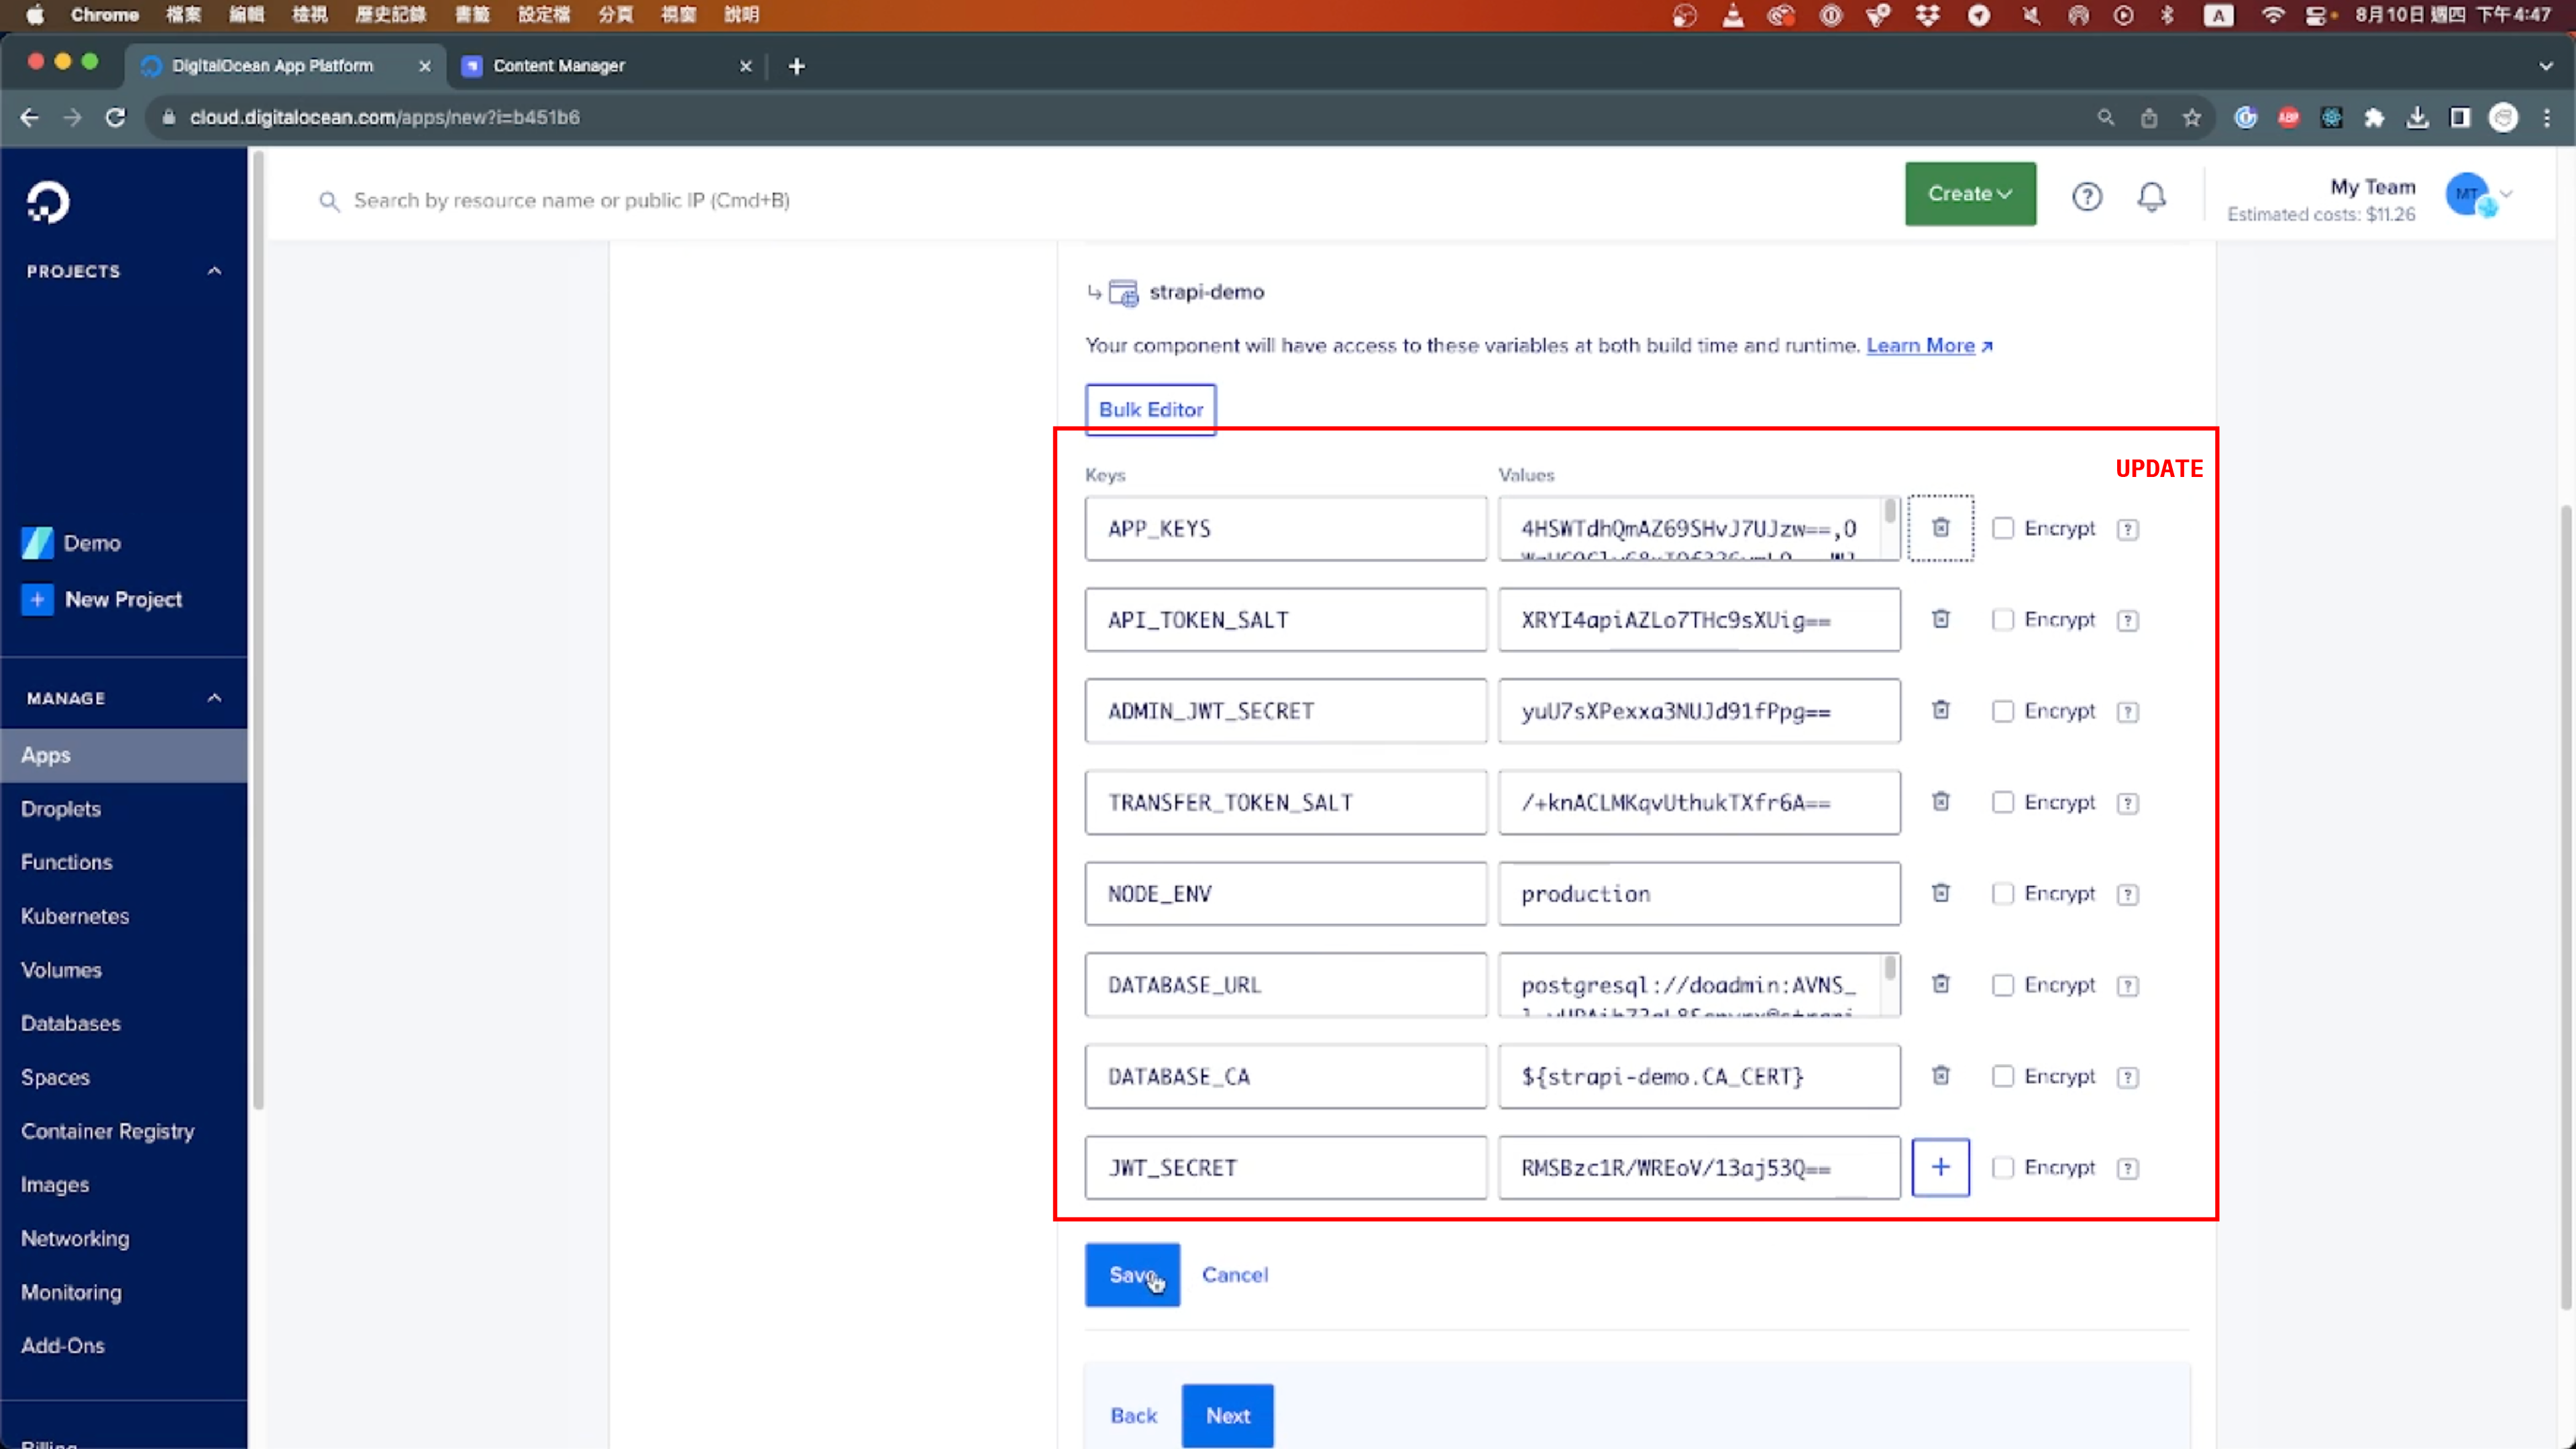
Apply the environment variables by copying and pasting them from your .env file. You don't need to include the IP and Port in this section.
Make sure to modify your app name and project folder as needed. Additionally, select the appropriate plan for this app based on your requirements. Once you've made these adjustments, click on Create Resources. This will trigger the automatic deployment of your Strapi application on DigitalOcean.
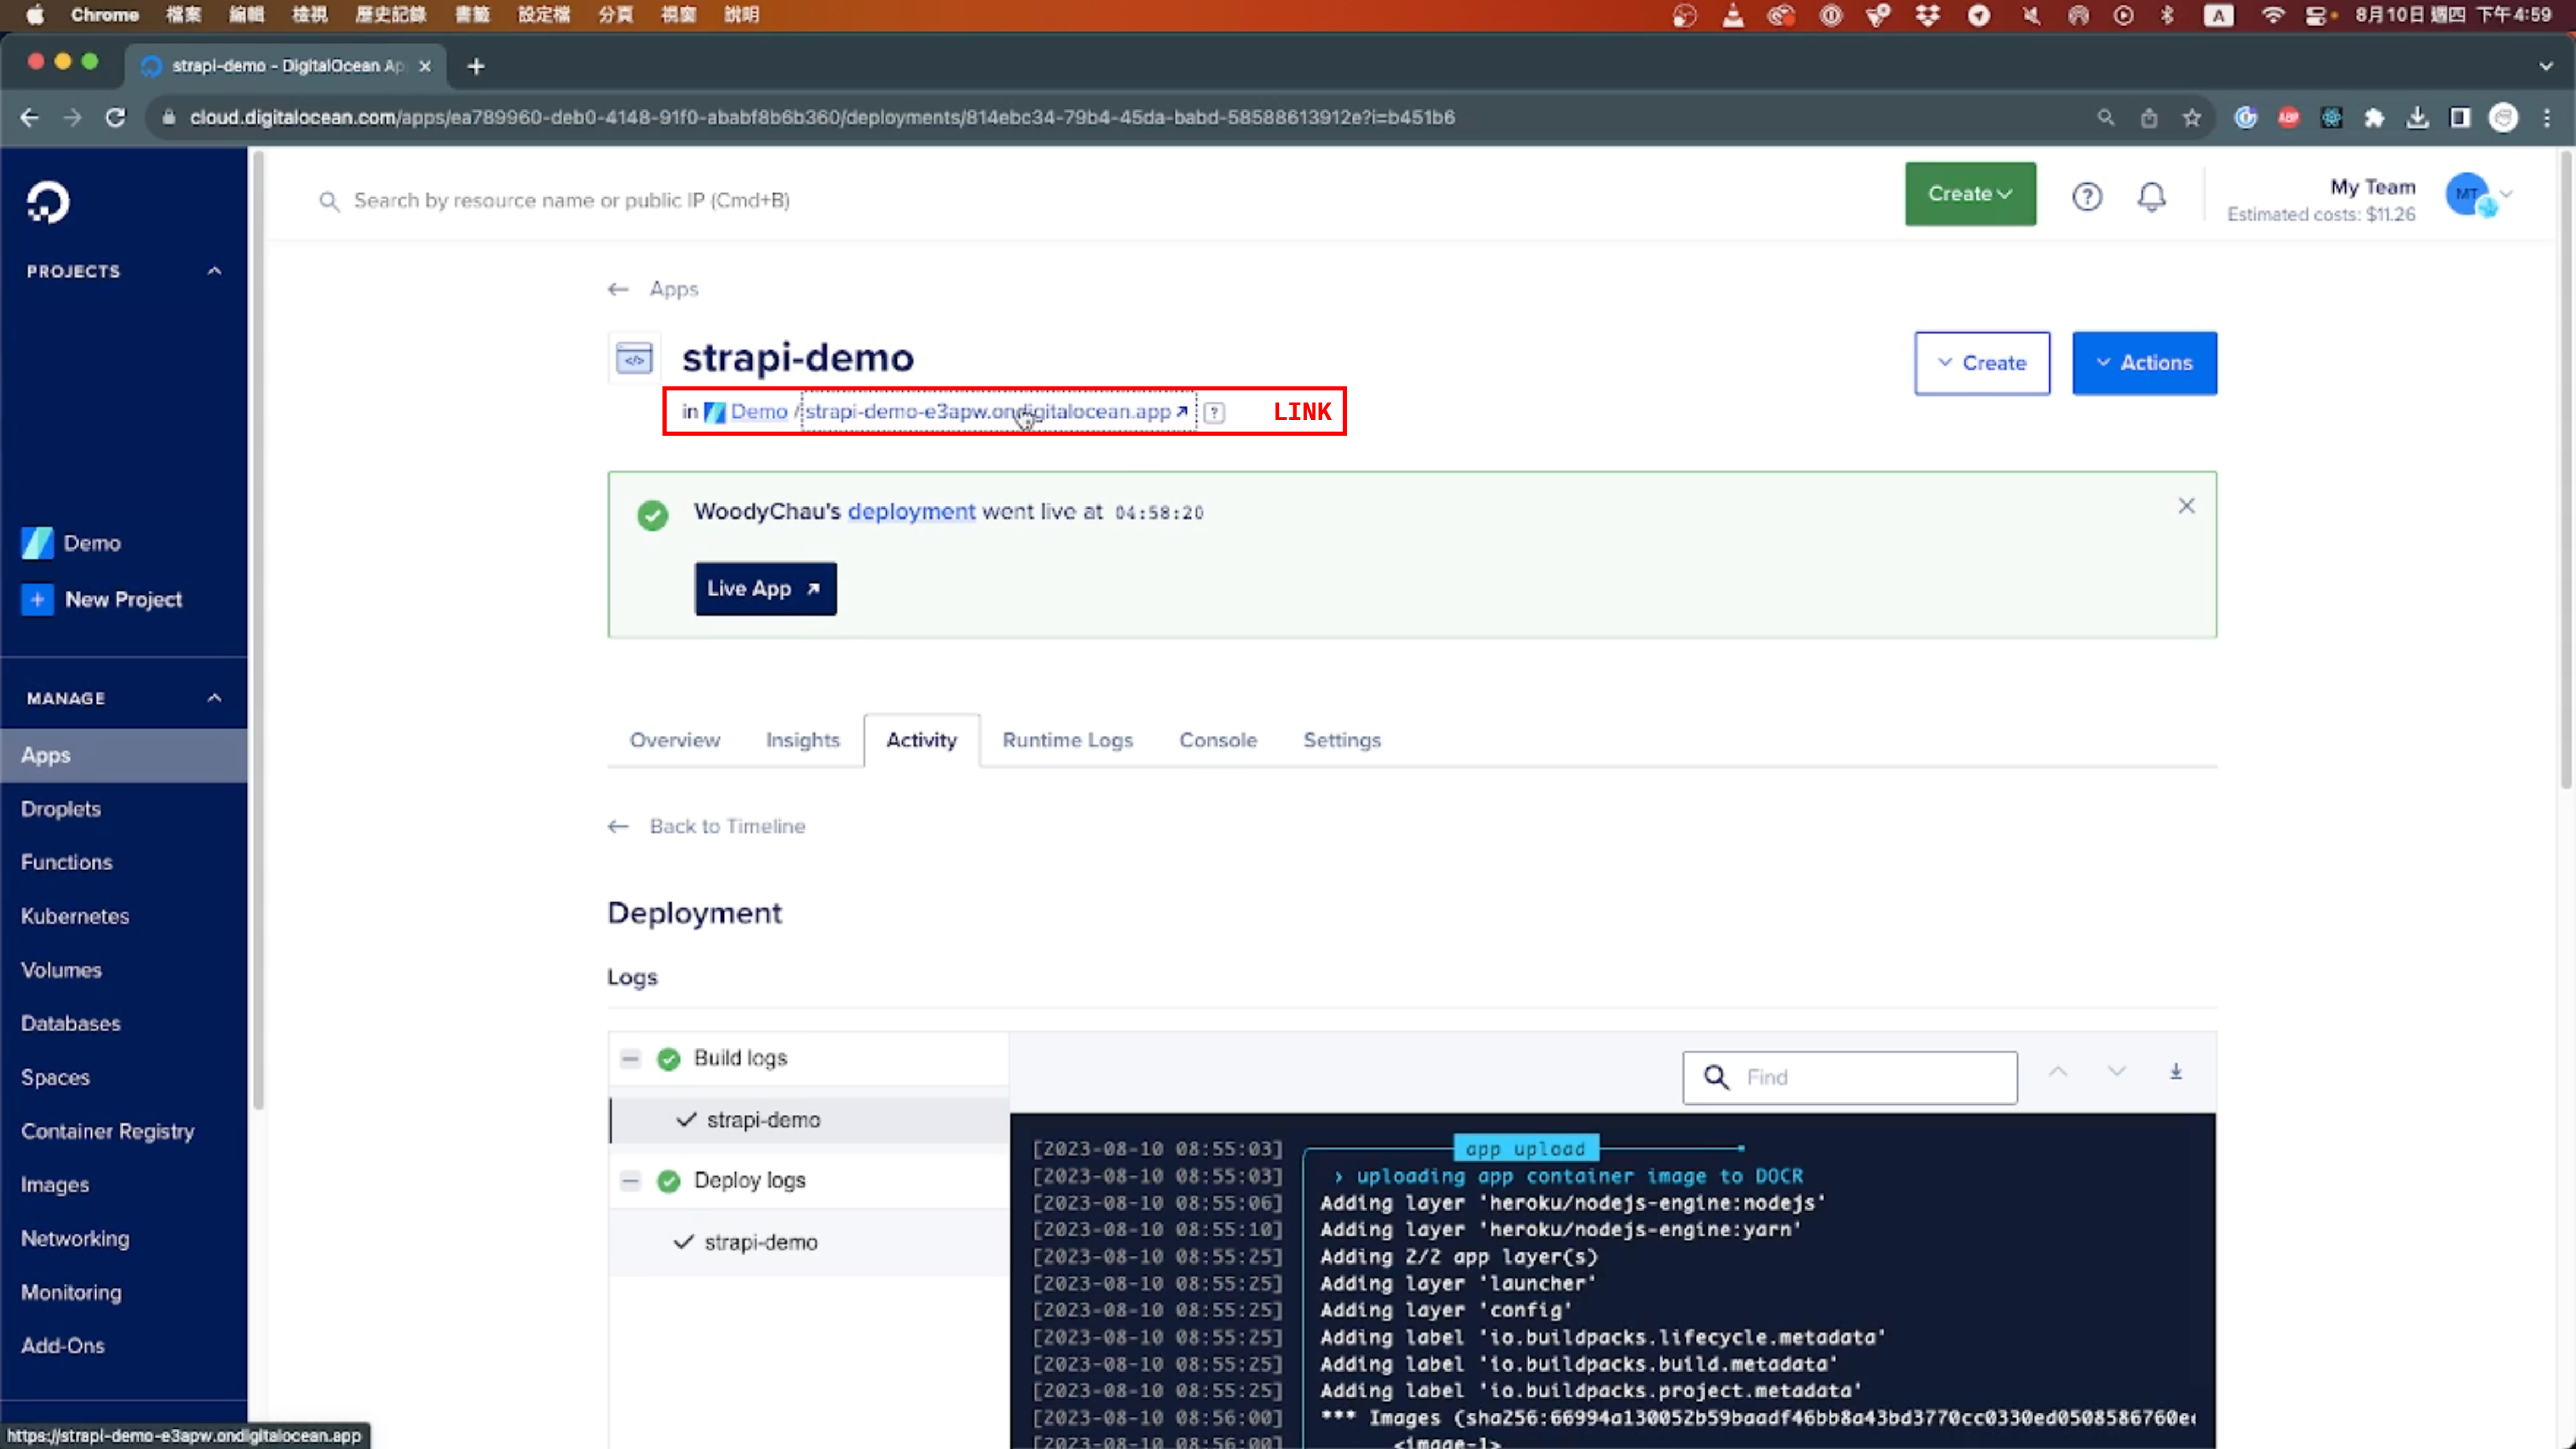
The deployment procedure may take a certain amount of time. While waiting for the deployment to complete, update the Trust Sources configuration. You'll need to establish a connection between your recently deployed app and the database. This action ensures that your application can securely access the database once it becomes operational.
Everything is now set up. Once the deployment process is finished, you'll receive a link from DigitalOcean. This link will lead you to the /admin page, where you can log in and review the records you previously created. At this point, your Strapi CMS is fully operational, and you're all set for productive development.

In the next tutorial, I'll walk you through how to connect your media storage to AWS S3. Additionally, I'll provide some valuable insights into developing with Strapi. Feel free to reach out if you have any questions. Happy developing!